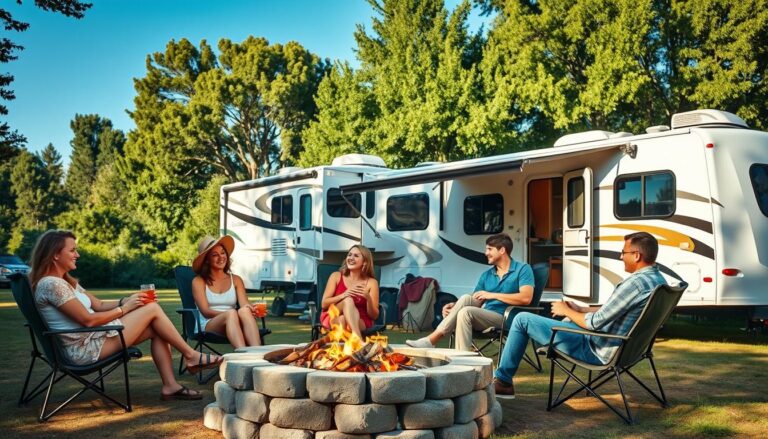
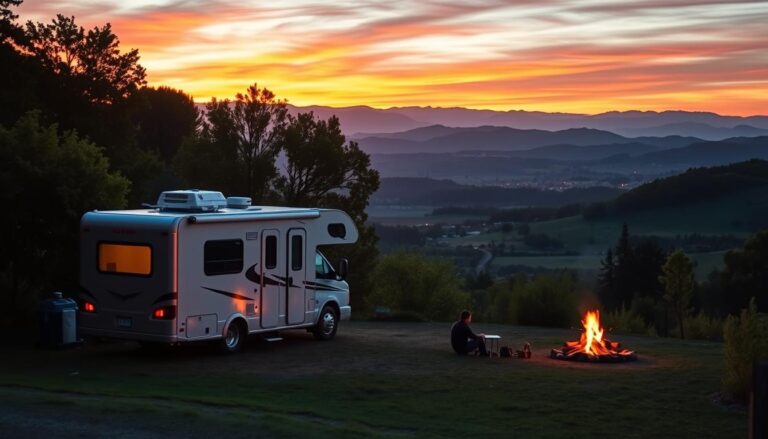
Imagine being surrounded by nature, with the campfire crackling nearby. You’re cooking a gourmet meal under the open sky. Camping meals don’t have to be just hot dogs and instant noodles. A DIY outdoor kitchen turns your camping trip into culinary adventures.
An outdoor kitchen keeps your RV or tent cool while you cook. It also lets you stay with your campers while cooking. You won’t miss out on campfire stories or sunset views while making dinner.
We’ll show you how to make a practical and safe cooking area for any camping trip. Whether it’s a weekend car camping or a seasonal site, we’ve got you covered. You’ll learn about choosing the right spot, the must-have gear, and how to stay within your budget. Plus, you’ll get tips on storing things and staying safe while cooking outdoors.
Key Takeaways
- Outdoor kitchens keep RV interiors cooler and maintain social connections during meal prep
- Proper location selection ensures safety, convenience, and compliance with campground rules
- Essential equipment includes portable cooking surfaces, organized storage, and adequate lighting
- Budget-friendly upgrades can transform basic setups into functional cooking spaces
- Safety considerations include fire prevention, food storage, and weather protection
- Creative storage solutions maximize efficiency in compact camping environments
1. Why Consider an Outdoor Kitchen for Camping?
Setting up an outdoor kitchen makes camping special. It’s not just about cooking. It changes your whole camping trip.
Cooking outside has many benefits. It’s cooler and more fun. It brings people together.
Benefits of Cooking Outdoors
Cooking outside keeps us cool. It’s perfect for hot days. Our living spaces stay comfortable.
It also means no bad smells. We can cook without bothering others. This keeps our homes fresh.
Outdoor cooking connects us with nature. We enjoy the outdoors while we cook. It makes meals special.
Enhancing the Camping Experience
Outdoor cooking makes memories. We can talk and play while we cook. It’s fun for everyone.
Kids love helping with meals. It’s a chance to teach them. They learn while having fun.
Outdoor kitchens are great for groups. We can all help cook. It’s a team effort.
Saving Time and Space
Outdoor cooking has more room. We can spread out and cook more. It’s easier to make big meals.
It’s also easier to clean up. We can wash dishes outside. This keeps things organized.
Cooking is faster outside. We can use different heat sources. This saves time and makes cooking easier.
2. Choosing the Right Location for Your Kitchen
Finding the perfect spot for your outdoor kitchen is key. It should be safe, convenient, and functional. We’ve learned from camping trips that the right spot makes cooking fun.
Always put safety first when picking a spot. Keep your cooking area 10-15 feet from where you sleep. This keeps fires away and prevents food smells from attracting animals.
Wind direction is also important. We check the wind before setting up our outdoor kitchen gear. This keeps smoke away and ensures good air for cooking.

Access to Water and Firewood
Having water nearby is very important. We need it for cooking, cleaning, and safety. Campground spigots are the best option when they’re available.
In remote areas, look for natural water sources. But never drink or cook with untreated water without filtering it. We always carry our own water storage.
Having firewood nearby is also key if you cook over an open fire. Look for areas with plenty of dry wood. Always check local rules about collecting firewood.
Your outdoor kitchen gear should include water containers. Bring at least two gallons of water per person per day for cooking and cleaning.
Proximity to Your Campsite Setup
The distance between your kitchen and camp areas is important. We choose a spot that’s close but safe. A 20-30 foot distance works well.
Make sure the path to your dining area is clear. We remove rocks and roots to avoid accidents with hot food or sharp tools.
Storage should be easy to reach. Your outdoor kitchen gear and food should be close to your cooking area. We arrange our storage, prep area, and cooking surface in a triangle for efficiency.
Considering Sunlight and Shade
Sun and shade change throughout the day. We choose spots that offer shade in the morning for breakfast. Early sun can make cooking too hot.
Afternoon shade is great for dinner. We look for natural shade or use canopies if needed. But some sunlight is good for drying dishes and food safety.
| Location Factor | Ideal Condition | Safety Consideration | Practical Benefit |
|---|---|---|---|
| Distance from Tent | 10-15 feet minimum | Fire hazard prevention | Reduces wildlife attraction |
| Wind Direction | Downwind from living area | Smoke management | Better cooking ventilation |
| Ground Surface | Level and stable | Equipment stability | Easier food preparation |
| Water Access | Within 50 feet | Emergency fire suppression | Convenient cleaning |
Ground stability is important. We look for level areas or make one. Uneven ground is dangerous and makes cooking hard.
Rocky or sandy surfaces are better than soft soil. We test the ground by walking on it. This ensures it’s stable for our gear.
3. Essential Tools and Gear for Your Outdoor Kitchen
We think quality camp kitchen essentials make a big difference. They turn your campsite into a place where you can cook great food safely and well.
Your outdoor kitchen needs to be functional, durable, and portable. Each piece of equipment should do more than one thing. It should also stand up to the outdoors.
Basic Cooking Equipment
Start with a 2-burner camp stove as your main cooking spot. It gives you control over heat and lets you cook many dishes at once. Look for ones with wind guards and flame controls.
Cast iron cookware is key for your camp kitchen. A cast iron skillet with lid is great for breakfast and dinner. Add a Dutch oven for stews and bread.
These surfaces keep heat well and get better with time. They work on stoves, over flames, or buried in coals.
Necessary Utensils and Tools
Sharp knives and non-porous cutting boards are essential for safety. Carry a good chef’s knife and a paring knife in sheaths. Use bamboo or plastic cutting boards for easy cleaning.
Your utensil set should include:
- Long-handled tongs for safe food handling
- Heat-resistant spatulas and ladles
- Wooden spoons that won’t scratch cookware
- Can openers and bottle openers
- Metal skewers for campfire cooking
- Small grater for cheese and spices
Choose durable, non-breakable tableware like melamine or stainless steel. These handle drops and temperature changes without breaking. Have enough plates, bowls, and cups for everyone plus some extras.
Don’t forget coffee gear! Whether it’s a French press, AeroPress, or pour-over, good coffee makes mornings better.
Portable Wash Stations
A clean kitchen is a safe kitchen. Set up a portable wash station to keep things clean. This keeps your kitchen organized and prevents germs.
A simple two-basin setup is good for basic needs. Use one basin for soapy water and another for rinsing. More complex systems include collapsible sinks and gravity-fed water dispensers.
Keep cleaning supplies like biodegradable soap, scrub brushes, and towels handy. Use extra water containers for washing dishes and cleaning.
Proper cleaning stops food-borne illness and makes your equipment last longer. Make washing dishes part of your cooking routine.
4. Selecting the Perfect Cooking Surface
Your cooking surface is key to a great outdoor kitchen. It affects every meal and how much you enjoy cooking outside. The right choice depends on your cooking style, group size, and fuel sources.
The cooking surface impacts meal prep time and flavor. Some surfaces are better for quick breakfasts, others for slow-cooked dinners. Think about your camping needs and meal preferences.

Grill Options: Gas vs. Charcoal
Gas grills are easy to use and control temperatures well. They heat up fast and are simple to adjust. You can start cooking quickly after lighting them.
Charcoal grills give a smoky flavor many love. They need more time and skill but taste better. Building and managing a charcoal fire is part of the fun.
Choose gas for ease or charcoal for flavor. Many campers use both for different meals.
Portable Stoves and Campfire Cooking
Portable stoves are great for quick meals and boiling water. They work well in windy conditions and heat evenly. Having a portable stove as a backup is wise.
Campfire cooking adds magic to meals. Get a good grill grate and a charcoal chimney starter for easy fire management. Practice these tips at home before camping.
The secret to campfire cooking is building the right fire and keeping coal beds right. Practice these tips at home before camping.
Building Your Own Cooking Surface
Creative campers build custom surfaces with fire bricks or metal grates. This lets you tailor size and height to your needs and space.
Blackstone griddles are popular for their large, flat surface. They’re great for many dishes and can feed lots of people.
When building your surface, focus on stability and heat spread. Use materials that can handle high heat and won’t warp. Think about portability if you move your setup a lot.
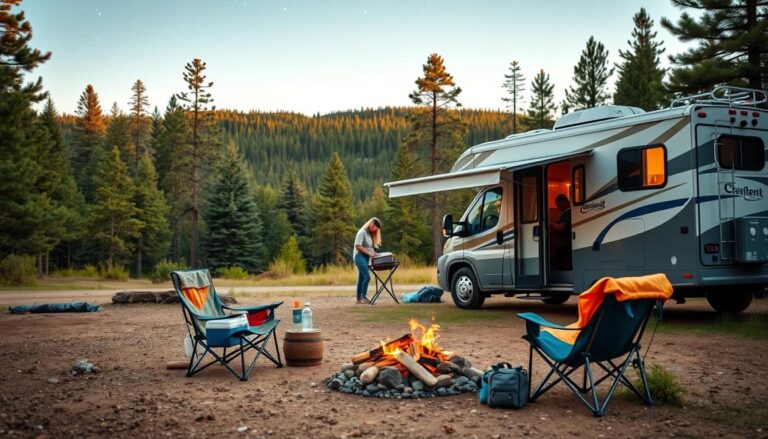
5. Setting Up Basic Cooking Stations
Efficient outdoor cooking starts with three work zones. These zones work together smoothly. By organizing our campsite kitchen, we avoid confusion and create a professional cooking environment outdoors.
Each station has its own role in our cooking process. We place them close but not too close to prevent mess. We think about how ingredients turn into meals when setting up.
Preparing Food Station
The food prep area is the heart of meal planning. We use a sturdy folding table for both work and storage. This table must be completely level and away from heat to keep food fresh.
Key items here are cutting boards, sharp knives, and mixing bowls. We store food in clear containers that are easy to stack. These containers help us see what we have and keep food safe from bugs and moisture.
This station also has cleaning supplies and paper towels. A small cooler is nearby for perishables. This setup lets one person prep food while others cook.
Cooking Station Setup
The cooking station is around our main heat source. We use a metal table or sturdy surface for a heat-resistant workspace. It needs good ventilation and clear paths for safety.
Our cooking tools are in a portable caddy near the heat. We have spatulas, tongs, and pot holders. A small table holds seasonings, oils, and cooking sprays for quick use.
Keeping temperatures right is key here. We have a water spray bottle for flare-ups. There’s also a spot for dirty dishes to avoid mixing with clean ones.
Serving and Dining Area
The serving area is where cooking meets eating. We place it downwind from cooking to keep diners smoke-free. A large table or smaller ones hold plates, dishes, and drinks.
This area has our dining essentials: plates, cups, utensils, and napkins. We have a drink station with coolers and dispensers. Condiments and seasonings are easy to reach but safe from wind and bugs.
Seating is important here. We use camp chairs, benches, or portable seats. The dining area should be welcoming and big enough for everyone to eat comfortably.
| Station Type | Primary Function | Essential Equipment | Storage Needs |
|---|---|---|---|
| Food Prep | Ingredient preparation and organization | Cutting boards, knives, mixing bowls | Stackable containers, cooler access |
| Cooking | Heat-based food preparation | Grill/stove, utensils, heat-resistant surfaces | Spice rack, tool caddy, cleanup supplies |
| Serving | Food presentation and dining | Serving dishes, plates, dining utensils | Beverage coolers, condiment containers |
| Cleanup | Washing and waste management | Wash basins, soap, drying rack | Trash bags, recycling bins, towels |
Proper station spacing prevents mess during meals. Each zone should be big enough for two people to work. This system makes outdoor cooking smooth and fun for all.
This three-station method is flexible. We can adjust it for our campsite’s needs while keeping the workflow. It works for small or big groups, making meal prep and cleanup easy.
6. Storage Solutions for Your Outdoor Kitchen
Having organized storage in your outdoor kitchen makes everything easy to find and use. It keeps your camping food safe and ready for your next trip. The right containers and organizing methods are key.
Camping food storage solutions protect your food from weather, pests, and temperature changes. Use different storage methods for different needs during your trip.

Organizing Cooking Supplies
We organize our cooking supplies in a way that makes them easy to find. Rubber totes with secure lids are great for dry goods like pasta and canned items. They stack well and keep moisture out.
For utensils and small tools, we use containers with clear lids. This lets us see what we need without digging. Magnetic strips on metal surfaces hold knives safely and within reach.
Spices and seasonings need special care. We put them in small, labeled containers that fit in a spice organizer. This stops spills and makes seasoning easier.
Keeping Food Fresh and Safe
Food safety is key when camping, more so in warm weather. We use coolers with ice for short trips. Pre-chilling the cooler and using block ice helps it last longer.
For longer trips, we use propane-powered refrigerators. They keep food safe for weeks without needing ice. This saves us from the trouble of always getting ice.
We pack raw meats in separate, sealed containers at the bottom of our cooler. This stops cross-contamination and keeps other foods safe. A thermometer helps us keep food at the right temperature.
Clever Storage Ideas
Creative storage ideas help us use space better in our outdoor kitchen. We use the inside of cabinet doors for things like dish towels. Hanging baskets on tables or trees hold fruits and veggies that don’t need to be refrigerated.
Vertical space is important in small camping setups. We use hooks and hanging organizers for things like spatulas. This keeps countertops free for cooking.
Our favorite trick is using mesh laundry bags for dirty dishes and utensils. These bags let air in while keeping everything together until it’s time to wash.
| Storage Type | Best For | Key Benefits | Capacity Range |
|---|---|---|---|
| Rubber Totes | Dry goods, canned items | Waterproof, stackable, pest-proof | 10-50 gallons |
| High-Quality Coolers | Perishables, beverages | Temperature control, ice retention | 20-150 quarts |
| Propane Refrigerators | Long-term food storage | Consistent cooling, no ice needed | 1.4-8 cubic feet |
| Compartment Organizers | Utensils, small tools | Easy access, prevents loss | Various sizes |
Remember, your storage system will change as you gain experience. We always look for ways to improve our organization based on our camping style and group size.
7. Incorporating Safety Measures
Enjoying outdoor cooking means keeping safety first. A safe cooking area keeps our family safe and makes the trip fun. These outdoor cooking tips help avoid accidents.
We place our kitchen 15 feet from tents and sleeping areas. This keeps sparks away from flammable things. We also make sure paths are clear for quick movement in emergencies.
Fire Safety Tips
Managing fire needs constant care and planning. We always have a water bucket or fire extinguisher near our cooking. Sand or dirt is better than water for grease fires, so we have a special container for it.
Wind direction changes how flames and smoke move. We check the weather before cooking and adjust our setup. Never leave cooking fires unattended, even for a few minutes.
We have a special place for hot cookware and utensils. Metal trivets or heat-resistant mats protect surfaces. This step helps avoid burns when reaching for equipment.
Food Safety Practices
Outdoor cooking makes food safety harder than indoor cooking. We use separate cutting boards for raw meat and veggies to avoid cross-contamination. Color-coded boards help remember which surface to use.
Without refrigeration, keeping food at the right temperature is key. We pack perishable foods in coolers with ice. Raw meat stays below 40°F until it’s cooked.
Hand washing stations are important to prevent illness. We have a dedicated wash area with soap, water, and paper towels. This tip saves trips to distant restrooms.
Cooked foods need quick attention. We serve meals within two hours of cooking, or one hour in hot weather. Leftovers go into coolers right after eating.
First Aid Essentials
Our first aid kit is easy to find but safe from splatters. It has burn gel, sterile bandages, antiseptic wipes, and pain relievers. Everyone knows where it is.
Burns can happen fast near hot surfaces and flames. We treat minor burns with cool water and burn gel. Serious burns need quick medical help, so we have emergency numbers ready.
Good lighting is key to avoid accidents. Battery-powered lanterns light our workspace without fire hazards. We don’t use candles or open flames for light.
Teaching safety to everyone makes a safe kitchen culture. Everyone shares responsibility for our safe outdoor kitchen.
8. Adding Comfort and Ambiance
Turning your outdoor kitchen into a special place is all about comfort and atmosphere. Adding thoughtful touches makes every meal a special event. The right seating, lighting, and decor turn your campsite into a cozy spot, just like home.
It’s not just about the right outdoor kitchen gear. We aim to create a space where everyone wants to hang out. Features like comfy seating encourage longer chats, shared stories, and fun times around food.
Seating Arrangements
Good seating is key to a welcoming outdoor kitchen. Pick flexible options that fit your group size and unexpected guests. Folding chairs with built-in cup holders offer comfort and convenience for everyone.
Portable benches are great for families. They save space and create a cozy feel. Some campers even build wooden benches that store outdoor kitchen gear.
Make a natural circle around your cooking area for easy chats. Place seating so everyone can talk to the cook without getting in the way. This setup keeps everyone involved and excited for the meal.
Lighting Your Outdoor Kitchen
Good lighting is both useful and adds to the look of your outdoor kitchen. We use a mix of task lighting for cooking and ambient lighting for dining. Task lighting should light up cutting boards, grills, and prep areas well.
Battery-powered LED strips are perfect for tables or cooking stations. They give bright, focused light where you need it. Solar lights are great for long trips because they charge during the day.
String lights add a magical touch to any space. Hang them between trees, around your dining area, or along your kitchen zone. Warm white bulbs create a cozy vibe, while colorful ones are perfect for parties.
Lanterns offer both light and style. Use them on tables, hang them, or mark paths. Many modern lanterns have dimmers, so you can adjust the light.
Creating a Cozy Atmosphere
Adding personal touches makes your outdoor kitchen feel like home. Outdoor rugs define the dining area and add comfort. They also help catch spills and make cleaning up easier.
Colorful tablecloths, placemats, and napkins add personality to your dining. Pick materials that can handle wind and spills. Weighted clips keep tablecloths from blowing away.
Small decorative items can make a big difference. Battery-powered candles add a warm glow without fire risks. Potted plants or fresh flowers bring natural beauty to your table.
Some campers add entertainment systems to their outdoor kitchen gear. Portable Bluetooth speakers provide music for meals. Small tablets or TVs can make special occasions even more memorable, but we balance tech with nature.
| Comfort Feature | Primary Benefit | Best For | Power Source |
|---|---|---|---|
| String Lights | Ambient lighting and atmosphere | Evening dining and socializing | Solar or battery |
| Folding Chairs with Cup Holders | Individual comfort and convenience | Adults and extended sitting | None required |
| Portable Benches | Space-efficient group seating | Families with children | None required |
| LED Task Lighting | Safe food preparation visibility | Cooking after dark | Battery or rechargeable |
| Bluetooth Speakers | Background music and entertainment | Social gatherings and parties | Rechargeable battery |
Adding weather protection makes your outdoor kitchen even more comfortable. Pop-up canopies provide shade and shelter. Side panels offer wind protection while keeping cooking open-air.
Remember, comfort features should make camping better, not harder. Choose items that are easy to pack, set up fast, and do more than one thing. We aim to make cooking a joy and every meal a celebration of the outdoors.
9. Maintaining Your DIY Outdoor Kitchen
A well-maintained outdoor kitchen is key for successful camping meal prep. It makes sure your kitchen stays safe and ready for adventures. We’ve found that regular care saves time and money, making outdoor cooking fun.
Keeping your kitchen in good shape protects it from weather and wear. It stops small problems from turning into big ones that spoil your trip.
Clean-Up Techniques After Cooking
Cleaning starts while cooking, not after eating. We clean spills right away and wipe surfaces when they’re warm. This makes cleaning up easier and stops tough buildup.
Our cleaning routine includes these essential steps:
- Scrape food off surfaces while they’re warm
- Use biodegradable soap and hot water for washing
- Rinse everything well to remove soap
- Dry items before storing to avoid rust and mold
We always bring special cleaning supplies for camping meal prep. This includes scrub brushes, biodegradable dish soap, and clean towels.
Weatherproofing Your Setup
Protecting your kitchen from the weather makes it last longer. We cover grills and stoves with waterproof covers when not in use. We also seal electronics to prevent moisture damage.
Metal surfaces need special care to avoid rust. We apply protective coatings and check for rust signs often. Prevention is cheaper than fixing.
In rainy weather, we use tarps or canopies for dry cooking. This keeps our camping meal prep on track, no matter the weather.
Seasonal Maintenance Tips
Before storing, we do a thorough check on all equipment. We clean, dry, and inspect each piece for damage or wear.
Our seasonal maintenance checklist includes:
- Deep clean all cooking surfaces and utensils
- Check gas and electrical connections
- Apply protective treatments to prevent corrosion
- Rotate stored food and check expiration dates
- Test all equipment before the next season
We store everything in a dry, controlled environment. This keeps it safe from extreme temperatures and humidity.
Regular maintenance is the key to years of reliable outdoor cooking adventures.
Proper care turns your outdoor kitchen into a reliable partner for camping meal prep. The time you spend on maintenance is worth it for long-lasting equipment and successful cooking.
10. Personalizing Your Outdoor Kitchen
Your outdoor kitchen becomes special when it shows your family’s style and personality. The best camping meal prep happens in places that feel like home, even in the wild.
Creative Decor Elements
Weather-resistant decorations make your cooking area welcoming. We use colorful cushions, personalized cutting boards, and signs that last through rain and sun. Mason jar lanterns and string lights add warmth at night.
Building Family Cooking Traditions
Your outdoor kitchen is where family memories are made. We keep a waterproof recipe book with our favorite dishes. Each family member adds their own recipes, making a special cookbook with photos and stories.
Connecting with Fellow Campers
Sharing your outdoor kitchen builds lasting friendships. We share photos and tips, inspiring others. Hosting potluck dinners or cooking demos shows off your space and lets you share recipes with neighbors.
Your outdoor kitchen is more than a cooking area. It’s a place for family moments and new friendships to grow. It’s where camping meal prep becomes special, under the stars.