Cold weather can turn into costly nightmares for RV owners who don’t prepare. We know how important it is to protect your RV before winter.
The RV Industry Association says up to 20% of owners face damage from not preparing enough. Water expands when it freezes, which can burst pipes and fail systems.
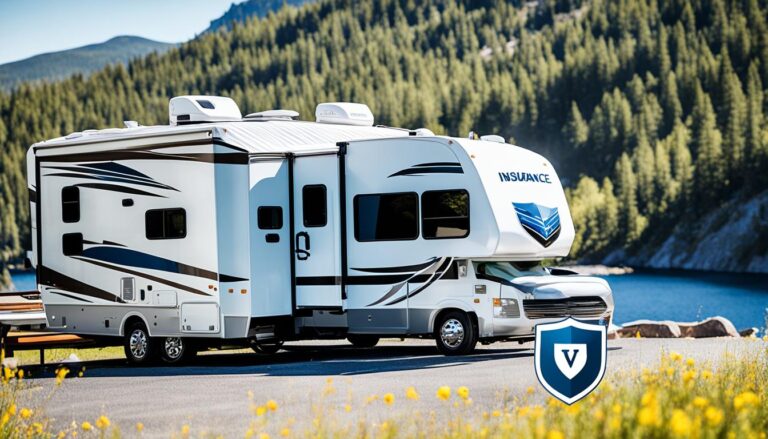
Most insurance won’t cover damage from freezing. This makes RV winterization key for all owners.
This guide will take you through each important step. It’s for both new and experienced RV owners. This step-by-step guide will help you succeed.
By learning how to winterize yourself, you can save money. You’ll avoid expensive repairs and keep your RV ready for spring.
Key Takeaways
- Twenty percent of owners experience preventable freeze damage annually
- Insurance typically excludes coverage for winterization-related damage
- Proper preparation protects pipes, tanks, and appliances from expansion damage
- Learning the process yourself saves money on professional services
- Following systematic steps ensures your vehicle stays ready for spring
- Adequate preparation prevents costly repairs and system failures
Understanding the Importance of Winterizing Your RV
Winterizing your RV is more than just keeping it from freezing. It’s about protecting a big investment. It also keeps your RV in top shape for future trips.
Water is the biggest danger to RVs in winter. When it freezes, water expands and can damage pipes and tanks. This can harm expensive appliances too.
Every winterize RV checklist aims to protect water systems. Even a little water can cause a lot of damage. This damage can be very costly.
Benefits of Winterizing
Winterizing your RV has many benefits. It saves money by avoiding expensive repairs. It also helps your RV last longer.
Prevention is always cheaper than repair. A good winterization process avoids costly repairs. It also keeps your RV’s value high.
Here are the main benefits of preparing RV for winter storage:
- Prevents burst pipes and cracked water tanks
- Protects expensive appliances from freeze damage
- Maintains warranty coverage on RV systems
- Reduces spring preparation time and costs
- Preserves interior surfaces from moisture damage
Winterizing your RV also gives you peace of mind. You know it’s safe and ready for spring. You won’t face unexpected repair costs.
Common RV Winter Damage
Knowing common winter damage shows why winterizing is key. Without proper prep, RVs face the same problems every year. These problems can be avoided.
Water damage is the most common and expensive issue. Burst pipes can flood your RV, damaging floors, cabinets, and electrical systems. Mold and mildew can also occur, posing health risks and bad smells.
“I’ve seen RVs with over $15,000 in damage from a single burst pipe. The water ran for weeks before anyone discovered the problem. Proper winterization would have prevented all of it.”
The table below shows common winter damage:
| Damage Type | Typical Repair Cost | Prevention Method | Risk Level |
|---|---|---|---|
| Burst Water Lines | $800 – $2,500 | Complete water system drainage | High |
| Cracked Holding Tanks | $1,200 – $3,000 | Proper tank drainage and antifreeze | High |
| Water Heater Damage | $600 – $1,800 | Bypass and drain procedures | Medium |
| Seal and Caulk Failure | $300 – $1,000 | Pre-winter inspection and repair | Medium |
We also face hidden damage from repeated freezing and thawing. This can weaken seals and cause small cracks to grow. It’s important to address these issues before they get worse.
Battery damage is another issue. Cold weather can reduce battery performance and cause permanent damage. Without proper prep, we lose battery life and performance.
Every item on our winterize RV checklist helps prevent damage. By understanding these risks and taking action, we protect our investment. The time spent preparing for winter saves us money and stress in the spring.
Essential Supplies for Winterizing
To learn how to winterize an RV, start with the right supplies. Having everything ready saves time and avoids trips to the store. Good supplies protect your RV from winter damage.
Make a checklist and gather supplies a week before starting. This lets you compare prices and have backups. Proper preparation prevents poor performance, and winterizing is no exception.
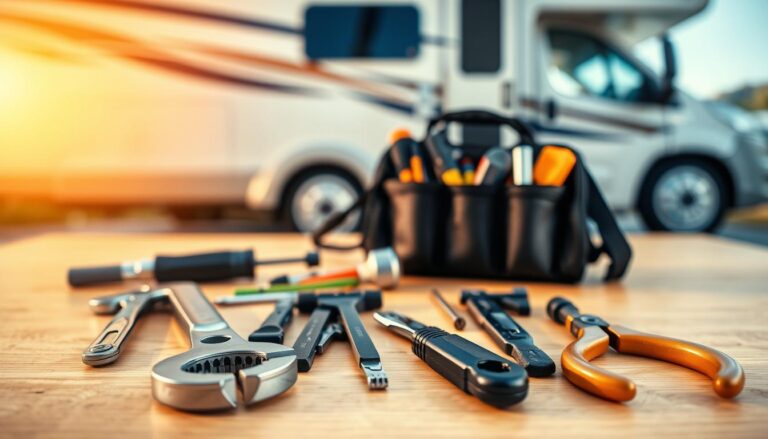
Tools You’ll Need
You’ll need basic tools and RV-specific equipment. A cordless power drill makes removing drain plugs easy. A socket wrench set is needed for plumbing fittings.
Two crescent wrenches and a flashlight are also key. A bucket is needed to catch water. You’ll be surprised at how much water your system holds.
A water pump converter kit or tubing helps with antifreeze. Some prefer a siphoning kit. Choose what works best for you.
Recommended Products
Choosing the best RV antifreeze is important. Use marine/RV antifreeze, not automotive antifreeze. Automotive antifreeze is toxic.
Buy 3-4 gallons of marine antifreeze for most RVs. Larger RVs may need more. Pink antifreeze is common and easy to spot.
A water heater bypass kit saves money and waste. If your RV lacks one, consider installing it. You’ll also need a new anode rod or plug for your water heater.
Invest in a cleaning wand for tank and line flushing. It removes debris and ensures cleaning before antifreeze is added. Choose a durable wand with adjustable spray.
Keep spare drain plug gaskets and fittings handy. They prevent delays if you find worn parts. These items are cheap but save time and hassle.
Preparing Your RV’s Interior for Winter
Getting your RV’s interior ready for winter is key to winter RV maintenance. Many RV owners focus on the mechanical parts, but forget the interior. A clean, organized RV protects your investment and makes spring camping a joy.
Start by removing all perishable items. Secure storage areas and protect surfaces from moisture. This saves money and avoids pests and mildew during storage.

Cleaning and Organizing
First, take out all perishable items from the RV. This includes food, drinks, meds, and toiletries that can freeze or go bad. Even shelf-stable items can attract pests or cause odors.
Then, clean every surface well. Use the right cleaners on countertops, tables, and appliances. Focus on areas where food can hide, like:
- Inside and around the refrigerator
- Microwave interior and exterior
- Pantry shelves and cabinets
- Dining area and kitchen surfaces
- Sink and faucet areas
Vacuum carpets and upholstery to get rid of crumbs and debris. Clean the bathroom fully, including the toilet, shower, and sink. Even small food bits can attract pests during storage.
Keeping things organized is important for winter RV care. Put away loose items in cabinets and drawers. Use bungee cords or latches to keep doors shut during transport or when temperatures change. This stops damage from shifting items and keeps animals away.
Protecting Fabrics and Surfaces
Keeping moisture away is key to protecting fabrics and surfaces in winter. Use moisture absorbers or desiccants in the RV to stop mildew and mold. Place these in closets, under beds, and in storage areas.
Use breathable fabric covers or old sheets on upholstered furniture. Avoid plastic covers, as they can trap moisture and cause mold. For leather, apply a conditioner before covering to prevent cracking in cold weather.
Make sure all windows, doors, hatches, and storage areas close well. Check seals and weatherstripping for gaps that could let moisture or pests in. Proper sealing keeps the interior safe and the structure sound.
A clean RV interior is your first line of defense against winter storage problems.
Leave cabinet doors and drawers a bit open for air to circulate. This helps prevent musty smells and reduces moisture that can damage wood and cause mold.
Winterizing Your RV’s Plumbing System
Winterizing RV plumbing means checking every water line and fixture. This keeps your RV safe from freeze damage, which can cost a lot to fix. We’ll show you how to protect your RV fully.
Your RV’s plumbing has many parts that need care. Water can hide in places you might not think of. Draining water and using antifreeze are key to avoid expensive damage in cold weather.
“A single frozen pipe can cause more damage than all other winterization oversights combined. The key is being thorough and systematic in your approach.”
Draining the Freshwater System
First, empty your freshwater tank. Turn off the water pump and open all faucets. This step gets rid of most of the water.
Then, find the drain plugs for your black and gray water tanks. Drain the black water tank first, then the gray. This order helps prevent contamination and ensures all water is drained.
Next, open the low-point drains on both hot and cold water lines. These are usually under your RV near the water heater. Let gravity drain the water from the lowest points.
Don’t forget to drain your water heater. Remove the drain plug or open the pressure relief valve. Turn off the water heater power source first. Some water heaters need a bypass valve adjustment during winterization.
Adding Antifreeze to the System
Using a water pump conversion kit makes adding antifreeze easier. This kit lets you draw antifreeze through your water pump. Or, you can use a separate pump to add antifreeze.
Only use RV-safe, non-toxic antifreeze for your system. Never use car antifreeze, as it’s toxic and can harm your plumbing. You’ll need 2-3 gallons of antifreeze for most RVs.
Start adding antifreeze at the faucet closest to your water pump. Turn on the pump and slowly open both hot and cold faucets. Keep going until pink antifreeze flows from both sides.
Work through each fixture in your RV. Include the kitchen sink, bathroom sink, shower, and outdoor faucets. Don’t rush – make sure antifreeze reaches every outlet.
| Fixture Type | Antifreeze Amount | Special Notes | Time Required |
|---|---|---|---|
| Kitchen Faucet | 1-2 cups per side | Check both hot and cold | 3-5 minutes |
| Bathroom Sink | 1 cup per side | Include popup drain | 2-3 minutes |
| Shower Head | 2-3 cups | Run until steady flow | 5-7 minutes |
| Toilet | 1-2 cups | Flush until bowl fills | 2-4 minutes |
| Outdoor Shower | 1-2 cups | Often forgotten fixture | 3-5 minutes |
Flush your toilet until antifreeze shows in the bowl. This protects the toilet’s inside parts. Pour more antifreeze into sink and shower drains to keep P-traps from freezing.
Winterizing Campground Connections
External water connections need special care. Disconnect and drain your fresh water hose completely. Store it in a warm, dry place to avoid cracking.
Remove and drain your water filters. Replace filters before your first spring trip for clean water. Store removed filters in a dry place, away from freezing.
Check your city water inlet and drain it properly. Some RVs have a check valve that can trap water. Check your owner’s manual for specific steps for your model.
Don’t forget outdoor shower connections if your RV has them. These are very vulnerable to freeze damage. Run antifreeze through these connections like the inside fixtures.
Consider using inlet covers or caps to keep debris and moisture out during storage. This simple step protects your fittings and makes spring prep easier.
Keep a record of your winterization steps with photos or notes. This helps you remember what to do next time. Proper winterizing RV plumbing gets easier with practice and good records.
Protecting Your RV’s Exterior
Winter weather can harm your RV’s exterior without protection. Your RV faces cold, snow, ice, and UV rays during storage. We’ll share RV winter storage tips to keep your RV looking and working well.
Protecting your RV’s exterior involves two steps. First, check and fix any spots where moisture can get in. Then, clean and wax to create a barrier.
Inspecting Seals and Caulking
Begin by checking seals around windows, doors, and roof spots. These spots are prime entry points for moisture. Look for cracks or where caulking has come loose.
Focus on your RV’s roof, as it gets hit hard by weather. Check vents, air conditioning units, and antenna mounts for damage. Effective RV winter storage tips include a roof check before winter.
If seals or caulking are damaged, fix them right away with RV products. Don’t wait until spring. Water damage can happen even in cold when ice melts and freezes again.
Think about getting your roof professionally sealed if you get a lot of snow. This can save you money on repairs later. Professional sealing gives you peace of mind in winter.
Waxing and Cleaning the Exterior
Clean your RV well before applying protective products. Remove dirt, grime, and road salt to prevent corrosion. Use RV-specific cleaners to avoid damaging your vehicle’s finish.
Apply a good wax or coating to protect against moisture and UV damage. This is key among RV winter storage tips to stop paint from fading. Work in small areas and follow the product’s instructions.
Don’t forget to cover vents, windows, and tires to protect them from snow and ice. Tire covers prevent UV damage and keep rubber flexible.
Here are more ways to protect your RV’s exterior:
- Install vent covers to keep snow and debris out
- Apply tire protectant to stop cracking and wear
- Cover exterior mirrors to avoid ice damage
- Seal slide-out mechanisms to keep moisture out
These RV winter storage tips for exterior care will keep your RV in great shape after winter. Protecting your RV now saves money and extends its life.
Maintaining Your RV’s Tires
Proper tire care is key for winterizing your RV. Many owners forget this important step. Your tires face challenges like temperature changes and UV rays during winter. Taking care of your tires now saves money and ensures safe travel when spring comes.
Temperature changes can affect your tires’ pressure. Cold weather lowers pressure, while warm days raise it. This constant change can damage your tires.

Inspecting for Wear and Tear
Do a thorough tire check before winter storage. Use the penny test to check tread depth. If Lincoln’s head is visible, it’s time for new tires.
Look for uneven wear patterns, which mean alignment or inflation issues. Check for cracks, bulges, or dry rot on the sidewalls. These can get worse during storage and be dangerous later.
Check the tire’s age by looking at the DOT code. The last four digits show the week and year it was made. Tires over six years old need to be replaced, even if they look good.
Proper Inflation and Storage
Keep tires at the maximum pressure listed on the sidewall. This prevents flat spots during storage.
Think about your RV’s weight when storing it. Use wheel chocks to prevent movement and tire stress. Try to move your RV a bit every few weeks.
Tire covers protect against UV rays, which can damage tires. Choose covers that fit well and breathe to avoid moisture buildup.
Some RV owners remove tires for long storage. This prevents flat spots but needs careful wheel support. Check your RV manual before removing tires.
Remember, taking care of your RV’s tires is important. Good maintenance means your tires will last for many adventures when it’s warmer.
Battery Care and Maintenance
Keeping your RV’s electrical system safe in winter starts with knowing how to care for your battery. Cold weather can cut battery power by up to 50%. It can also damage batteries if not stored correctly. Proper winter RV maintenance of your battery system ensures reliable power when spring arrives.
Batteries change a lot in cold weather. Lead-acid batteries are very sensitive to sulfation in cold. This can cause permanent damage and shorten their life.
“A battery that’s properly maintained during winter storage can last three times longer than one that’s neglected during cold months.”
Disconnecting the Battery
It’s best to disconnect your RV’s battery before winter. This stops small parts from using power when the RV is off. Always disconnect the negative terminal first, then the positive.
Turn off all electrical systems before you start. Make sure lights, fans, and appliances are off. Clean battery terminals with a wire brush and baking soda solution.
Label your battery cables for easy reconnecting in spring. Take photos of the battery setup before you disconnect. This makes your winter RV maintenance easier.
Storing Batteries Safely
Storing batteries indoors is best in winter. Choose a spot that’s between 32°F and 80°F with good air flow. Never store batteries directly on concrete floors as it can cause discharge.
Use wooden pallets or plastic shelves to store batteries. Check electrolyte levels monthly and add distilled water if needed. Keep terminals clean and apply petroleum jelly to prevent corrosion.
Battery maintainers are great for keeping batteries charged during storage. They give a small charge to keep batteries at the right level. Make sure to choose one that fits your battery type.
| Battery Type | Storage Temperature | Maintenance Frequency | Special Requirements |
|---|---|---|---|
| Lead-Acid | 40-60°F | Monthly | Check water levels |
| AGM | 32-80°F | Bi-monthly | Sealed maintenance-free |
| Lithium | 50-70°F | Quarterly | Partial charge storage |
| Gel Cell | 40-70°F | Monthly | Avoid overcharging |
Regular checks keep your batteries healthy all winter. Use a multimeter to test voltage monthly. A fully charged 12-volt battery should read 12.6 volts or higher. If it’s lower, it needs charging or a professional check.
Starting the Winterization Process
Starting to winterize your RV can feel overwhelming. But with the right steps, it’s easier. Whether you have a small travel trailer or a big Class A motorhome, knowing how to winterize an RV helps protect it from winter damage.
Begin planning to winterize your RV two weeks before the first freeze. This gives you time to get supplies, do the work, and fix any unexpected problems.
Getting a professional to winterize your RV costs $150 to $300, based on your RV’s size. But learning how to winterize an RV yourself saves money and teaches you about your RV’s systems.
Essential Preparation Steps
Before you start, figure out what your RV needs. Fifth wheels, travel trailers, and motorhomes each have their own challenges for winterizing.
Some RVs have extra appliances like ice makers or dishwashers. These need special care because they have their own water lines and drainage.
First, find your RV’s owner manual. Then, set up a well-lit workspace. Have all your tools and supplies ready before you start.
Comprehensive Timeline Planning
Having a good timeline helps you not rush through winterizing. Spread the tasks over several days, if you’re new to winterizing.
Weather affects your winterizing schedule. Avoid working when it’s freezing to prevent water line damage. Do outdoor tasks like seal checks and cleaning on mild days.
| RV Type | Estimated Time | Complexity Level | Special Considerations |
|---|---|---|---|
| Travel Trailer | 4-6 hours | Beginner | Basic plumbing, external storage |
| Fifth Wheel | 6-8 hours | Intermediate | Multiple levels, larger systems |
| Class A Motorhome | 8-12 hours | Advanced | Engine cooling, complex plumbing |
| Class B/C Motorhome | 6-10 hours | Intermediate | Compact systems, engine components |
Winterize your RV when you won’t need it for a few months. Starting too early wastes antifreeze, and waiting too long can cause freeze damage.
Think about your local weather when planning. Places in the north need to winterize earlier, while the south can wait until later in the fall or early winter.
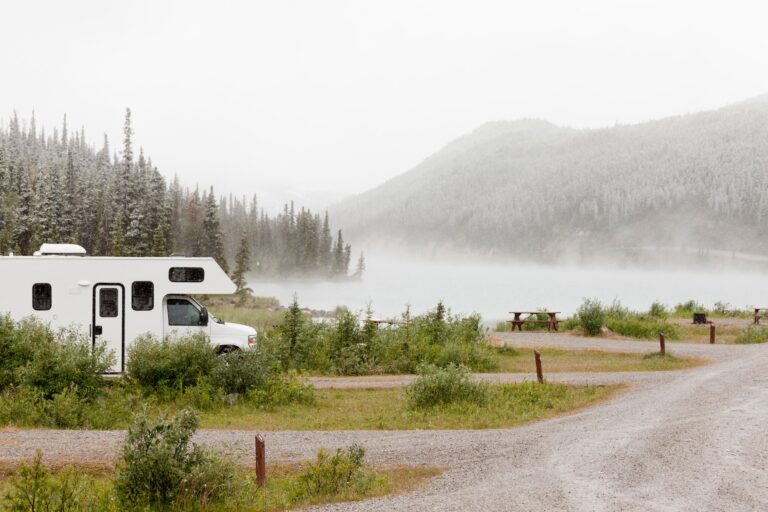
Choosing the Right Storage Option
Choosing the right storage for your RV in winter is key. It can mean a smooth spring or costly repairs. You need to balance protection, cost, and convenience. Your choice affects how your RV handles winter.
Today’s storage choice impacts your RV’s condition when spring comes. Climate-controlled facilities offer the ultimate protection but cost more. Outdoor storage needs more prep but is cheaper.

Indoor vs. Outdoor Storage
Indoor storage is best for your RV. Climate-controlled environments keep temperatures steady and protect from extreme weather. Your RV stays dry, avoiding moisture damage that’s expensive to fix.
But indoor storage is pricier than outdoor options. Choose indoor if you live in harsh winters or have a valuable RV. The extra cost is worth the peace of mind.
Outdoor storage is good when indoor is too expensive or not available. Look for covered parking or carports for some weather protection. Here are tips to make outdoor storage better:
- Choose elevated locations to avoid water pooling
- Find spots with natural windbreaks like trees or buildings
- Ensure good drainage around the storage area
- Consider portable carports for additional protection
Quality Storage Facility Features
Quality storage needs careful evaluation. Security features are most important when comparing facilities. Look for gated access, cameras, and on-site management.
Visit storage places at different times. This shows you the lighting, traffic, and safety. Trust your instincts about the facility’s condition and management.
Consider these key features when choosing storage:
- Insurance requirements and liability coverage
- Accessibility hours and key policies
- Contract terms and payment flexibility
- Maintenance services and emergency contact procedures
- Size restrictions and maneuvering space
For home storage, check local laws and homeowner association rules. Good neighbor relations matter when storing your RV at home. Choose level ground and ensure proper drainage for the best storage.
The right storage choice protects your RV through winter. These tips help you choose wisely, keeping your RV in great shape until spring.
Inspecting & Securing Your RV
Before winter, we must tackle two big issues: pests and security. A detailed check can spot weak spots that pests or thieves might exploit. Securing your RV well means it will be just as you left it come spring.
Winter brings special challenges. Rodents and critters seek warm places in the cold. Your RV becomes a tempting target for thieves and vandals when it’s left alone.
Do this check in daylight for the best view. Look over your RV inside and out. Note any problems so you can fix them before next year.
Preventing Unwanted Guests
Rodents are a big threat to RVs in storage. They can sneak in through tiny holes. Mice can get through holes as small as a dime, and rats need a bit more room.
Seal all entry points first. Check around plumbing, electrical, and vents. Use steel wool or copper mesh to block small gaps, as rodents can’t chew through these.
Pay extra attention to these spots:
- Slide-out mechanisms and seals
- Exterior storage compartments
- Furnace and water heater vents
- Refrigerator exterior vents
- Electrical cord and sewer hose storage areas
Remove all food inside your RV to keep pests away. Even sealed packages can be opened by rodents. Clean all surfaces and vacuum to get rid of crumbs and food bits.
Place mouse traps inside your RV. Snap traps work well, but avoid poison baits to avoid bad smells. Check and replace traps often while it’s stored.
Comprehensive Security Planning
Keeping your RV safe from theft needs several steps. Start with simple steps and add more based on your storage spot and budget. Visible security can scare off thieves more than hidden systems.
Wheel locks are a good first step. They stop your RV from moving, even if someone gets inside. Choose strong models that can’t be cut or tampered with.
Hitch locks keep your travel trailer safe. For motorhomes, use steering wheel and brake pedal locks to stop thieves.
Think about getting an RV alarm system. Modern ones have motion sensors, door and window alerts, and can send texts to your phone. Some even track your RV’s location if it’s stolen.
| Security Measure | Protection Level | Cost Range | Installation Difficulty |
|---|---|---|---|
| Wheel Locks | High | $50-150 | Easy |
| Hitch Locks | Medium | $25-75 | Easy |
| Alarm Systems | High | $200-800 | Moderate |
| GPS Tracking | Very High | $100-300 | Moderate |
Take photos of your RV before you store it. Include shots of the outside, inside, and any valuable items. Keep these pictures somewhere safe for insurance.
Make sure all doors, windows, and compartments lock well. One unlocked spot can ruin your whole security plan. Test each lock and replace any that are weak or broken.
Good winter RV care means stopping pests and thieves. These steps protect your RV and make storage worry-free until spring.
Post-Winterization Checklist
Before you store your RV for winter, do a final check. This ensures you’ve done everything on your winterize RV checklist right. It helps avoid expensive problems when spring comes.
Doing a full check gives you peace of mind. Checking twice now saves you from future troubles. It makes sure your RV is ready for winter’s cold.
System Verification and Safety Checks
Begin by checking your water systems are winterized. Make sure your water heater’s off. This stops it from turning on by accident in the cold.
Check that all faucets are closed well. Go through your RV and test each one. Open faucets can let antifreeze out, making pipes freeze.
Look at your antifreeze levels in drain traps and toilet bowls. The pink antifreeze should be there. Add more if it’s low to keep pipes safe.
“A thorough post-winterization inspection is your insurance policy against winter damage. Every minute spent checking your work now prevents hours of repairs later.”
Ongoing Monitoring During Storage
Visit your RV often during winter. Monthly checks catch problems early before they get big. Watch for pests, damage, and security issues.
Check your RV’s outside for cracks or damage from the weather. Make sure your cover is tight. Heavy snow can harm your RV.
Watch for water pooling around your RV. Bad drainage can cause moisture and foundation problems. Fix any drainage issues right away to protect your RV.
Keep a log of any changes or concerns. A simple log helps you track patterns and identify recurring issues. This is useful for spring prep.
Now your RV is winter-ready! You can relax knowing it won’t leak or have water damage in the spring. Your careful steps and final check mean a successful winterization.
Spring Prep: Getting Your RV Ready to Go
Spring is here, and it’s time for camping adventures. After winter, your RV needs special care before you can go. Dewinterizing is as important as winterizing.
Start getting your RV ready two weeks before your first trip. This lets you fix any problems found during checks.
Essential Steps After Winter Storage
First, remove all covers and protective stuff from your RV. Look for winter damage outside. Check for cracks or pests.
Then, flush out the antifreeze from your water system. Run fresh water through faucets, toilet, and shower until it tastes and smells clean. Reconnect your battery and check all electrical systems.
Check your tires next. Look for flat spots or cracks. Winter can harm tires, so check them well.
Complete System Testing
Test all appliances like the fridge, stove, and AC. Run the generator if you have one. Make sure propane connections and safety systems work right.
Good spring prep makes your RV safe and ready for fun camping all season.