Your recreational vehicle is your ticket to freedom and adventure on the road. But, you don’t need to spend a lot or visit the mechanic all the time to keep it running well.
We’re here to share some RV maintenance tips that every owner should know. These simple tasks will help you keep your vehicle in great shape. Regular care means safer trips and a longer life for your RV.
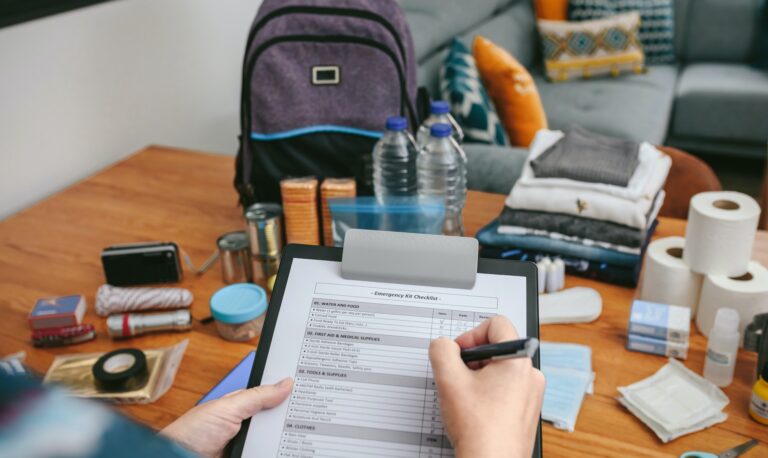
As fellow RV lovers, we know your vehicle needs regular checks. The good news is, many important tasks are easy for you to do. We’ll show you how to do each one step by step.
These easy tasks will empower you to take care of your RV without spending a lot. Let’s explore the key activities that make DIY care easy and fulfilling.
Key Takeaways
- Regular DIY upkeep saves money and extends your recreational vehicle’s lifespan
- Basic inspections and routine care prevent costly repairs down the road
- Most essential checks require common tools and minimal technical knowledge
- Consistent upkeep ensures safer travels and better performance
- Taking control of your vehicle’s health builds confidence and saves time
Why Regular RV Maintenance is Important
Regular RV maintenance is more than just keeping things clean. It makes our travels safer and more enjoyable. Every DIY task we do helps our RV run better and last longer.
Knowing why we need to maintain our RVs keeps us on track. Let’s look at the three main reasons why it’s so important.
Protecting Your Investment
Our RVs are big investments, costing tens of thousands of dollars. Regular maintenance keeps this investment safe and saves us from expensive repairs later.
By following a maintenance checklist, we catch small problems early. A simple seal replacement is cheaper than fixing water damage. Regular fluid changes also prevent engine damage that could cost a lot to fix.
Well-kept RVs keep their value better than neglected ones. Potential buyers can tell the difference between a well-maintained RV and one that’s been ignored. This care pays off when it’s time to sell or upgrade.
Ensuring Safety on the Road
Safety is a big reason for our maintenance choices, even for full-time travelers. Breaking down in remote places is dangerous and can often be prevented with regular checks.
Tire blowouts, brake failures, and electrical issues can cause serious accidents. Routine safety checks help us find and fix these problems before they become big risks. This keeps our families safe on the road.
Emergency roadside help might not always be available in remote spots. By doing our own maintenance, we become more self-sufficient and less dependent on others.
Enhancing Performance and Efficiency
A well-maintained RV performs better in every way. Regular maintenance improves fuel efficiency and reduces breakdowns, making sure everything works right.
Clean air filters and proper tire pressure help a lot. These simple tasks can make your RV go further on a tank of gas. Over time, these savings really add up.
| Maintenance Task | Performance Benefit | Efficiency Gain | Safety Impact |
|---|---|---|---|
| Regular oil changes | Smoother engine operation | Better fuel economy | Prevents engine failure |
| Tire pressure checks | Improved handling | Reduced fuel consumption | Prevents blowouts |
| Brake inspections | Consistent stopping power | Reduced wear on components | Prevents accidents |
| Battery maintenance | Reliable electrical systems | Longer component life | Prevents roadside failures |
Regular maintenance means fewer unexpected repairs on our trips. Nothing ruins a vacation faster than a broken-down RV in an unfamiliar place. Staying up to date with our maintenance checklist lets us enjoy our trips more.
Inspecting and Cleaning the Roof
Inspecting and cleaning the roof is key to keeping your RV in top shape. The roof keeps everything inside dry. Regular care stops expensive repairs and keeps your home comfy.
The roof faces harsh weather all the time. Rain, snow, UV rays, and temperature changes can damage it. Ignoring roof care can lead to costly damage inside that’s easy to avoid.
Tools You’ll Need
Having the right tools makes roof care easy. Get your tools ready before you start. This saves time and keeps you safe.
Good tools mean a job well done. Spending on quality tools is worth it for better results and safety. Here’s what we use:
| Tool Category | Specific Items | Purpose | Safety Notes |
|---|---|---|---|
| Access Equipment | Sturdy ladder, non-slip shoes | Safe roof access | Always have someone spot you |
| Cleaning Supplies | Garden hose, mild soap, soft brush | Remove dirt and debris | Avoid harsh chemicals |
| Inspection Tools | Flashlight, measuring tape | Identify damage areas | Check in good lighting |
| Repair Materials | Dicor sealant, putty knife | Fix minor issues | Use manufacturer-approved products |
Step-by-Step Inspection Guide
We inspect the roof step by step to catch problems early. First, we walk around the RV to spot obvious issues. This helps us know where to focus next.
On the roof, we check every inch carefully. Look closely at seams, vents, and air conditioning units for leaks. These spots get stressed from travel.
We look for signs of trouble during our check. Cracks mean leaks might start soon. Soft spots show water has already gotten in. Discolored spots often hide moisture problems that need fixing fast.
Check the sealant around roof openings well. Skylights, vents, and mounts need flexible sealant to keep water out. Look for gaps or where sealant has pulled away.
How to Clean Your RV Roof
Cleaning your RV roof right keeps it strong and protective. We clean before sealing to ensure adhesion. This keeps the roof safe from the weather.
First, remove loose debris from the roof. Sweep away leaves, twigs, and dirt. Use a soft-bristled brush to avoid scratching. Clean from one end to the other.
Mix mild soap with water for cleaning. Avoid harsh chemicals that can harm the roof or void warranties. We use biodegradable soaps for the environment.
Apply the cleaning solution in sections to prevent drying. Scrub gently with your brush, focusing on stains. Work in the shade when possible to avoid drying too fast.
Rinse well with clean water from your hose. Start at the top and go down to remove all soap and debris. Make sure all cleaning solution is gone before the roof dries.
Let the roof dry completely before sealing. Moisture under sealant can cause problems. This step ensures your roof stays protected for years.
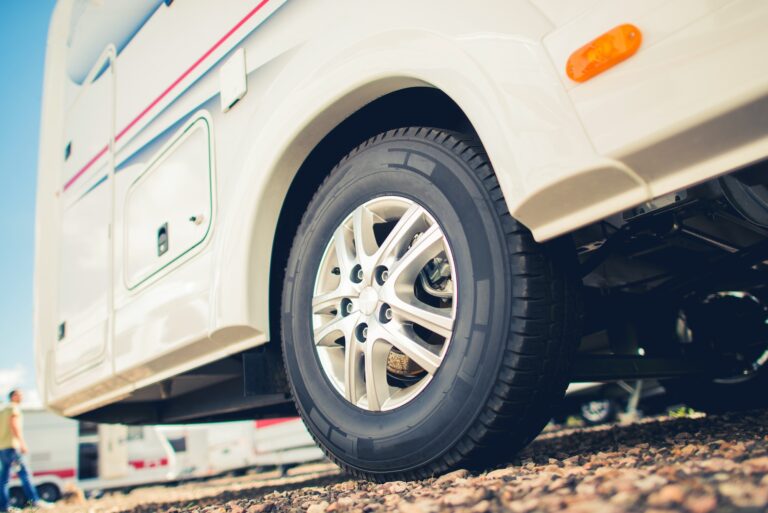
Checking Tire Pressure and Condition
Tire care is a top RV maintenance essential. Tire failures can be very dangerous, making it key to check them often. This is true when we’re carrying heavy loads or exploring far-off places.

Tires lose pressure, which is why checking them before we go is so important. This is even more true during winter months.
Importance of Proper Tire Maintenance
Good tire care keeps us safe and our RV in top shape. Tire failures are a big risk we face on the road, often without warning.
Well-maintained tires help us save on fuel and enjoy smoother rides. They also prevent damage to our RV’s suspension and alignment.
For RV maintenance for beginners, starting with tire care is a smart move. We can feel the difference in how our RV handles when our tires are in good shape.
How to Check Tire Pressure
Always check tire pressure when tires are cold, before driving far. Use a reliable tire pressure gauge instead of just looking at the tires. RV tires can look fine even if they’re not properly inflated.
Make sure to inflate tires to the weight rating of your RV, not the max pressure on the tire. This info is in your owner’s manual or on a placard inside the RV.
Don’t forget to check the spare tire’s pressure during each inspection. A flat spare won’t help in an emergency, so it’s important to check it.
Signs of Tire Wear
Look for uneven tread patterns during inspections. These often mean the tires are not aligned right or are not inflated properly.
Cracks, bulges, or any separation of tire layers mean the tire could fail soon. These signs need immediate action to avoid blowouts.
Always check lug nuts with a torque wrench during inspections. Loose lug nuts can cause wheels to separate, which is very dangerous.
Measuring tread depth regularly helps us know when to replace tires. Experts say to replace RV tires when tread depth is 4/32 of an inch, even if they look fine.
Maintaining Fluid Levels
Keeping an eye on your RV’s fluids is key to avoiding big repair bills. It keeps your travels smooth and worry-free. This is a big part of RV care and maintenance.
Fluid maintenance is more than just checking levels. We need to know what each fluid does. This way, we protect our RV and avoid costly repairs in remote places.
Key Fluids to Check
Our RVs need several important fluids to run right. Engine oil keeps parts moving smoothly and prevents damage. We should check it often and change it when needed.
Coolant stops our engine from getting too hot. Low levels can cause engine failure. So, checking it is very important.
Brake fluid makes sure we can stop safely. It’s critical, whether we’re towing or driving a big motorhome.
Power steering fluid makes moving our RV easy. Without enough, steering gets hard and dangerous.
For RVs with slide-outs, hydraulic fluid is key. We should look at these systems and check fluid levels often.
How to Check and Top Off Fluids
We start by looking at our owner’s manual for fluid types and amounts. Using the wrong fluid can harm our systems and void warranties.
Before checking fluids, we make sure our RV is level and the engine is cool. Hot fluids can give wrong readings and be unsafe.
To check engine oil, we use the dipstick. We add oil slowly, checking often to avoid too much.
Coolant levels are checked at the overflow reservoir when the engine is cool. Never remove the radiator cap when it’s hot.
Brake and power steering fluid reservoirs have clear sides with level markers. We check these monthly and add fluid as needed.
| Fluid Type | Check Frequency | Warning Signs | Replacement Interval |
|---|---|---|---|
| Engine Oil | Every 500 miles | Dark color, metal particles | 3,000-5,000 miles |
| Coolant | Monthly | Rust, low levels, leaks | 2-3 years |
| Brake Fluid | Monthly | Dark color, low levels | 2 years |
| Power Steering | Monthly | Whining sounds, hard steering | 50,000 miles |
| Transmission | Monthly | Burnt smell, slipping | 30,000-60,000 miles |
Importance of Regular Fluid Maintenance
Regular fluid checks are key to a good RV maintenance schedule. They help us catch problems early and avoid big repair costs.
Right fluid levels keep our engine safe from damage. Without them, we face expensive repairs and could be stuck far from home.
Our brakes need clean, enough brake fluid to work right. Regular checks mean we can stop safely, keeping everyone on the road safe.
For RVs with slide-outs, keeping fluid levels up is vital. It stops seal damage and keeps slide-outs working well. We’ve seen slide-outs fail without proper care, causing big problems.
Prevention costs less than repair. By making fluid checks part of our routine, we ensure trouble-free trips and keep our RV’s value up.
We suggest checking fluids monthly and before big trips. This simple habit has saved many RV owners from emergencies and expensive towing costs.
Testing the Battery Health
Regular battery testing stops unexpected power failures on our adventures. Your RV’s battery keeps lights, water pumps, and appliances working. Without care, you might get stuck with a dead battery.
Testing your battery’s health is key. A simple voltmeter test shows its condition. This helps you replace batteries before they fail.
Signs Your Battery Needs Attention
Several signs show your RV battery needs help. Slow engine cranking means your battery is weak.
Dim lights inside and out mean low voltage. You might also hear clicking when starting the engine.
The best way to check is with a voltmeter. Here’s what the readings mean:
- 12.5 – 12.7 volts: Battery is fully charged and healthy
- 12.2 – 12.4 volts: Battery is partially charged
- Below 12.2 volts: Battery needs charging now
- Below 10.5 volts: Battery might need to be replaced
How to Clean Battery Terminals
Clean terminals ensure good electrical connections. Always disconnect the negative cable first to avoid sparks.
Mix baking soda with water for a cleaning solution. Use a wire brush to clean terminals and cable ends. Some use cola to dissolve corrosion.
Rinse with clean water after scrubbing. Dry well before reconnecting cables. Apply petroleum jelly to prevent corrosion.
Tips for Extending Battery Life
Proper care extends your RV battery’s life. Avoid deep discharges to prevent damage.
Keep terminals clean and connections tight. Loose connections cause resistance and heat damage.
Store batteries in cool, dry places during off-seasons. Extreme temperatures harm batteries.
Use a battery maintainer when not using your RV. These devices charge your battery right without overcharging.
Regular testing helps you catch problems early. This way, you avoid being stuck with dead batteries. By following these 10 Simple RV Maintenance Tasks You Can Do Yourself, your electrical system stays reliable for many camping trips.
Cleaning and Flushing the Water System
We think cleaning and flushing the water system is key to our RV maintenance checklist. A clean water system keeps us healthy and makes sure our water tastes good. It stops bacteria from growing and keeps our water safe to drink.
It’s very important to keep the water system clean, more so after storage or when using different water sources. Clean water is essential for cooking, drinking, and personal hygiene on our travels.

Steps for Flushing the System
We start by emptying the fresh water tank. Then, we fill it with a mix of water and bleach. This mix sits for hours to kill off bacteria and bad stuff.
After that, we run the mix through all faucets, shower heads, and the toilet until we smell chlorine. This makes sure the whole system is treated. We then rinse everything with fresh water and check for leaks.
The hot water heater needs special care during this DIY RV maintenance task. We flush it every year and check the anode rod if it has one. This helps the heater last longer and saves us money on repairs.
Importance of Regular Cleaning
Regular cleaning keeps our family safe by stopping bacteria from growing. Stagnant water is a breeding ground for harmful germs. Prevention is always better than dealing with contaminated water on a camping trip.
Clean water tastes better and doesn’t have musty smells. It makes our cooking and drinking more enjoyable. It also stops minerals from building up and damaging our pipes and fixtures.
Regular cleaning also makes our water system parts last longer. Sanitizing solutions get rid of deposits and stop corrosion, which saves us money on replacements.
Seasonal Maintenance Tips
In the spring, we carefully dewinterize our system. Once it’s warm enough, we flush out antifreeze and sanitize the tank before our first trip.
During dewinterizing, we also check for winter damage under our rig and sinks. Inspecting for leaks helps avoid water damage and expensive fixes. We fix any damage right away before we leave.
In the fall, we winterize to protect against freezing damage. We drain all water and use RV antifreeze to keep pipes from bursting. This saves us thousands of dollars in damage.
Throughout the year, we check the water pump and test the pressure relief valves. These simple steps keep our system working well all year.
Inspecting and Replacing Light Bulbs
Keeping our RV’s lights in good shape is easy and very important for safety. Proper lighting maintenance helps avoid accidents and keeps us legal. This part of our RV guide focuses on a key safety feature.
A dead bulb might seem small, but it can cause big problems. We don’t want to find out about bad lights during a check or in an emergency. Checking lights often is one of the easy RV maintenance tasks that keeps us safe.
Different Light Categories
Our RVs have many lighting systems for different needs. Exterior safety lights like headlights and taillights tell other drivers what we’re doing. They help us stay seen in all kinds of weather.
Inside our RV, lights make it cozy and useful. We find LED and incandescent bulbs in various sizes. Marker lights and clearance lights show our RV’s size to others, which is very important.
Knowing about bulb types helps us keep the right ones. LED bulbs last longer and use less power than old bulbs. But, we often find both in RVs, needing different replacement methods.
Systematic Light Inspection Process
We start by checking all exterior lights one by one. Turn on each light circuit while walking around the RV to make sure they work. This includes headlights, taillights, and more.
Having someone help makes this easier. One person turns the lights on while the other checks them. If alone, we use mirrors or park near a reflective surface to see rear lights.
We look for more than just dead bulbs. Cracked lenses, corroded sockets, and loose connections also affect how well lights work. We also check for moisture, which means seal problems.
Checking interior lights means testing each one and watching for flickering or dimming. These signs often mean bulbs or connections are failing.
Light Bulb Replacement Procedure
Replacing RV light bulbs is simple and can be done with basic tools. Always turn off the power before starting any electrical work. This keeps us safe and protects the RV’s electrical system.
We remove the lens or cover first. Most RV lights use screws or twist-lock mechanisms. Keep track of small screws to avoid losing them.
To remove the old bulb, pull straight out or twist counterclockwise, depending on the type. We avoid touching halogen bulbs with our bare hands to prevent them from failing early.
Putting in a new bulb is the reverse of this. Make sure the bulb fits right in its socket before putting everything back together. Test the new bulb before putting the fixture back together to make sure it works.
We keep spare bulbs for all types in our RV. Finding the right bulb in small towns can be hard. Our toolkit has common bulb sizes for both inside and outside.
This simple task shows how important easy RV maintenance tasks are for safety and fun travel. Regular light checks and quick replacements keep us safe and legal, making every trip better for everyone.
Checking and Maintaining Appliances
Good appliances make your RV a cozy home on wheels. They’re key to great trips, not bad ones. Keeping them in check is vital for RV maintenance for beginners.
Appliance failures can mess up your camping plans. So, we focus on checking and fixing them before each season.
Essential Appliances to Inspect
Your RV has many important appliances. They keep you safe and comfy while traveling.
The refrigerator is super important. We test it on AC and DC power. Also, clean the coils and vents often.
The stove and oven need checks for gas leaks and ignition. Make sure flames are blue, not yellow or orange. Look for damage on gas connections.
The water heater needs flushing yearly. Turn it on and check hot water at all faucets. Also, check the vent for blockages.
Air conditioning and heating systems keep you comfy. Test them before your first trip. Clean or replace AC filters and watch for odd noises.
Cleaning and Maintenance Steps
Each appliance needs special care. Follow the maker’s advice for best results and longer life.
- Refrigerator maintenance: Clean inside with soap, defrost if needed, and sanitize with bleach solution (1/4 cup bleach per gallon of water) if mold develops
- Stove care: Remove grates and pans for cleaning, check gas connections, and test ignition systems
- Water heater service: Drain and flush yearly, replace anode rod as needed, and clean vents
- HVAC maintenance: Change filters often, clean coils, and ensure good airflow
These RV maintenance essentials keep your appliances working well. Regular cleaning stops costly repairs later.
When Professional Help is Needed
Some tasks are DIY, but others need a pro. Knowing when to ask for help keeps you and your RV safe.
Call a pro right away for gas smells, electrical burning odors, or fridge cooling issues. Gas and complex electrical repairs are not for beginners.
We suggest professional help for generator fixes, air conditioner refrigerant problems, and any safety concerns. Your safety is always more important than saving money on repairs.
Keep a logbook for all maintenance and repairs. It helps spot patterns and helps techs when needed.
Sealing Windows and Doors
Window and door seals protect your RV from water damage and energy loss. They keep drafts, leaks, and bugs out. Good sealing keeps you comfortable and saves money on repairs.
Check these seals often as part of your RV maintenance schedule. Weather, UV rays, and temperature changes wear them down. Inspect them twice a year and after bad weather.

Tools Needed for Sealing
Right tools make sealing easier and better. Always get your supplies ready before starting. Quality tools mean better results that last.
You’ll need a caulk gun for smooth sealant application. A utility knife removes old sealant and dirt. Clean supplies prepare the surface well. A heat gun removes tough old sealant, and plastic scrapers protect surfaces.
Choose the right sealants for your needs. Butyl tape is good for permanent jobs. Polyurethane caulk is flexible for moving parts. Silicone sealants resist weather but are harder to remove.
Step-by-Step Sealing Guide
Clean the area around windows and doors first. Remove dirt, debris, and old sealant. Clean surfaces help sealant stick better and last longer.
Cut the sealant tube tip at a 45-degree angle for easy application. Apply sealant in one go along the gap. Work slowly to avoid air bubbles.
Smooth the sealant right after with your finger or a tool. This makes it look professional and covers well. Wait for the sealant to cure before using the area again.
Signs That Sealing is Needed
Look for cracks, gaps, or holes in seals. RV care and maintenance means checking for hard and brittle seals.
Feel for drafts around windows and doors. Water stains mean seals have failed. Fixing them early saves money on big repairs.
High energy costs during trips might mean bad seals. Unusual bugs inside also point to seal problems.
| Seal Condition | Visual Signs | Performance Issues | Action Required |
|---|---|---|---|
| Good | Flexible, intact, no cracks | No drafts or leaks | Continue monitoring |
| Fair | Minor cracks, slight hardening | Occasional drafts | Plan replacement soon |
| Poor | Large cracks, brittle texture | Noticeable drafts, water entry | Replace immediately |
| Failed | Missing sections, complete separation | Major leaks, pest entry | Emergency repair needed |
Regular sealing keeps your RV comfy and saves money. Make seal checks part of your routine. Preventive care is cheaper than big repairs and makes camping fun for years.
Cleaning and Maintaining the Hitch
Keeping your hitch in good shape is key. It connects your vehicle to your trailer, making safe towing possible. Regular cleaning, lubrication, and checks are vital.
A dirty hitch can be very dangerous. Dirt, grease, and road salt can cause corrosion. So, we always make sure to clean and maintain it well.
Tips for Proper Hitch Maintenance
Start with cleaning to remove dirt and grease. Use warm soapy water and a stiff brush. This stops corrosion.
After cleaning, check all bolts and connections. Towing can loosen them. Also, inspect the hitch ball for wear or damage.
Here are our top RV maintenance tips for hitch care:
- Clean the hitch after every trip, even in winter
- Make sure your hitch ball fits your trailer right
- Check safety chains for wear and damage
- Ensure electrical connections are clean and tight
- Look for metal stress or deformation
Importance of Lubrication
Lubrication is very important for smooth hitch use. We use marine-grade grease on the hitch ball and coupler. It protects against wear.
We also grease moving parts like sway control devices. They work hard during towing. Fresh grease keeps them working right.
Don’t overdo it with grease. Too much can attract dirt and cause problems.
How to Inspect Your RV Hitch
We inspect the RV hitch before and after towing. We look for problems to avoid danger.
First, we check for metal damage. We look at welds and high-stress areas. Any damage needs a pro’s help.
Then, we check safety chains and electrical connections. These are critical for safety. We also test the coupler to ensure it works right.
Documenting Maintenance Tasks
Keeping detailed records makes your DIY RV maintenance smarter. We’ve found that keeping records is as vital as doing the maintenance itself. We learned this the hard way when we forgot when we last changed our generator oil or rotated our tires.
Organized RV owners keep up with maintenance by documenting everything. This simple habit helps them spot patterns and plan expenses better.
Creating Your Personal Maintenance Log
A detailed maintenance log is key for DIY RV maintenance. We write down every task, including the date, mileage, and costs. This helps us track everything from oil changes to seasonal prep.
We also note any unusual sounds or wear patterns. These observations help us catch problems early.
Consistency is the secret. We update our log right after each task, no matter how small. This keeps us from forgetting important details or losing track of our schedule.
Advantages of Detailed Documentation
Keeping thorough records has many benefits. They help us spot recurring issues and stock the right spare parts. They also come in handy for warranty claims or insurance.
Regular maintenance keeps your rig safe and ready for trips.
With historical data, budget planning gets easier. We can plan for expenses and set aside funds for services. Detailed records also boost your RV’s resale value by showing it’s been well cared for.
Our maintenance log helps technicians when we need professional help. It saves time and leads to more accurate repairs.
Modern Tools for Tracking Maintenance
Today, there are many tools for RV maintenance checklist. We’ve tried apps, spreadsheets, and logbooks. Cloud-based systems are great for full-time travelers because you can access your records anywhere.
The most important thing is to pick a method you’ll use all the time. Whether it’s an app or a notebook, choose what fits your lifestyle.
Popular tools include apps that remind you, spreadsheets, and logbooks. The key is to find what works for you and stick with it.
Conclusion: Start Your DIY Maintenance Today
Keeping our RV in good shape doesn’t have to be hard. We’ve learned simple steps to make RV ownership easier. Learning these skills boosts our confidence and peace of mind.
Benefits of DIY Maintenance
Doing our own maintenance saves us a lot of money each year. Professional shops can be expensive, but we can do most tasks with basic tools. We learn about our RV’s systems and catch problems early.
Knowing our RV’s condition makes us safer. Regular checks prevent breakdowns on long trips. We feel secure knowing we’ve checked everything important.
Maintaining Your RV for a Better Experience
Our trips are more fun when we trust our RV. We don’t rely on service shops or worry about finding mechanics in new places. We fix small issues right away, avoiding big problems.
Resources for Further Learning
Our RV’s manual gives us the right info. Online forums and YouTube videos share tips and how-tos. Local RV clubs let us learn from others.
Every expert was once a beginner. With these ten tasks, we’re ready to be confident RV owners.