Keeping your RV’s water clean is key. Bacteria, algae, mold, and mildew can quickly build up if you don’t take care of it. This can make your water taste bad, smell bad, and even be harmful to your health.
Most makers say you should clean your water tank every year. This is best done in the spring when you’re getting ready for the season. You’ll mix bleach or a special cleaner with water. Then, you’ll run it through your whole system, wait 12-24 hours, and flush it all out.
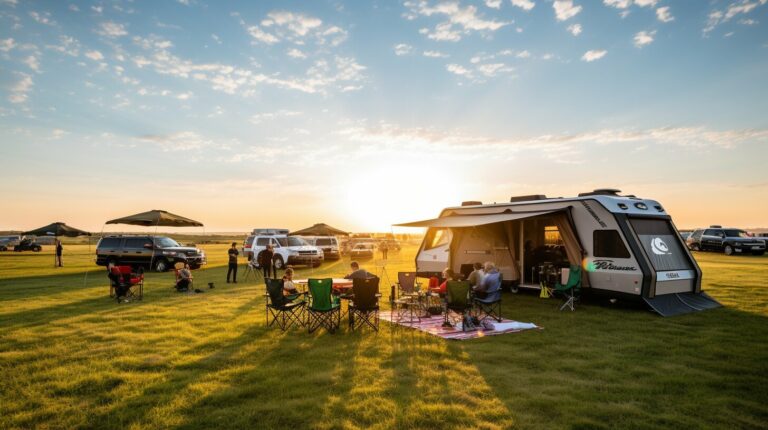
This guide will teach you all about RV water tank cleaning and upkeep. We’ll show you when to do it, how to do it, and what to do if things go wrong. Our aim is to help you keep your water as clean as possible, no matter where you go.
Key Takeaways
- Sanitize your RV fresh water tank annually, preferably during spring preparation
- Use bleach solution or commercial sanitizers mixed with water for effective cleaning
- Allow sanitizing solution to sit in the system for 12-24 hours before flushing
- Circulate the cleaning solution through all faucets, shower heads, and water lines
- Flush the entire system thoroughly with fresh water after sanitization
- Regular maintenance prevents bacteria, mold, and unpleasant odors in your water supply
Understanding the Importance of Sanitizing Your RV Water Tank
RV water tank sanitation is more than just upkeep. It’s about keeping you healthy and ensuring clean water on every trip. Your RV’s water system needs regular care because of its unique challenges.
The inside of your RV is perfect for germs to grow. When water sits, bad stuff multiplies fast. So, keeping your water tank clean is key for your safety.
Why Regular Sanitization is Essential
Your RV’s water system is different from home plumbing. The dark, warm tanks are great for germs to grow. These include bacteria, algae, mold, and mildew.
Sanitizing regularly stops this problem. Without cleaning, even the cleanest water gets dirty fast. RV plumbing’s small space makes this happen quicker.
Traveling in an RV also brings temperature changes. Heat makes bacteria grow, and cold lets biofilm form. So, regular RV water tank sanitation is your best defense.
Potential Health Risks of Contaminated Water
Dirty water systems can make you very sick. You might get stomach problems like nausea, vomiting, and diarrhea. These can ruin your camping trip.
Dirty water can also hurt your lungs and sinuses. Taking showers or cooking can release harmful particles. Bathing in dirty water can also irritate your skin.
“Waterborne illnesses affect millions of Americans every year. RVs are at high risk because of their closed water systems.”
Children and older people are more at risk from dirty water. Their bodies have a harder time fighting off germs. So, keeping your RV water tank maintenance up is very important for family trips.
Benefits of a Clean Water System
A clean water system means you always have fresh-tasting water. It gets rid of bad smells and tastes. This makes drinking water enjoyable anywhere you go.
Regular cleaning also makes your plumbing last longer. Clean water stops mineral buildup and corrosion. This saves you money on repairs and replacements later.
The biggest benefit of RV water tank sanitation is peace of mind. Knowing your water is safe lets you enjoy your trips more. Clean water systems also help keep your RV’s value up.
Signs Your RV Water Tank Needs Sanitizing
Knowing when your water tank is contaminated is key to safe drinking water on the road. Spotting these signs early stops health problems and keeps our RV trips fun. We must watch our water system for signs that it needs cleaning.

| Warning Sign | Description | Likely Cause | Urgency Level |
|---|---|---|---|
| Unpleasant Odors | Musty, sulfurous, or rotten egg smell | Bacterial growth or stagnant water | High |
| Water Discoloration | Yellow, brown, or greenish tint | Algae growth or mineral buildup | High |
| Cloudiness | Murky or hazy appearance | Suspended particles or microorganisms | Medium |
| Unusual Taste | Metallic, musty, or bitter flavor | Chemical contamination or bacteria | High |
Unpleasant Odors in the Water
Foul-smelling water from your faucets is a clear sign of trouble. These smells can be musty, sulfurous, or like chlorine. They show up when you first turn on the water.
Bacteria cause these bad smells as they grow in standing water. Hydrogen sulfide gas smells like rotten eggs, while other bacteria smell musty or earthy.
Test water from different faucets in your RV. Even mild smells mean contamination is starting.
Discoloration or Cloudiness of Water
Changes in your water’s look mean it’s contaminated and needs cleaning. Any water that’s not clear is a health risk.
Yellow or brown water means rust, sediment, or organic matter. Green water has algae, often from sunlight or warm temperatures.
Cloudy water has particles, minerals, or tiny organisms. This turbidity makes water unsafe and means it needs a full clean.
Unusual Taste in Drinking Water
Changes in water taste often happen before you see or smell problems. Metallic, bitter, or musty flavors mean chemicals or bacteria are present.
Regular taste tests from different faucets are important. We should taste small amounts of water every day to catch early signs of trouble.
Listen to your taste buds if they notice something off. Even slight changes mean it’s time to clean your water system to avoid bigger problems.
When to Sanitize Your RV Water Tank
Figuring out how often to sanitize RV water tank is key for RV owners. We suggest a schedule based on how often you use it and store it. This keeps your water system clean and safe for your travels.
Sanitizing frequency changes a lot. Seasonal changes, storage periods, and water source quality all play a part. Knowing these factors helps you know when to sanitize.
Before First Use of the Season
Spring dewinterization is a critical time for sanitizing. Even a little water left over can harbor bacteria. These grow in dark, moist places and need a good cleaning.
We sanitize our RV water system before our first trip of the year. This removes any contaminants that built up during storage. Manufacturing residues in new RVs also need to be cleaned out.
The dewinterization process includes a full system flush. This gets rid of antifreeze and other contaminants before using fresh water.
After Long Periods of Inactivity
Long periods without use are perfect for bacteria to grow. We sanitize after two to four weeks of inactivity with water in the tank. Stagnant water is a bad place for harmful microorganisms.
Even if it’s stored covered, contamination can happen. Temperature and humidity changes can make bacteria grow faster. Regular monitoring helps know when to sanitize.
Full-time RVers should sanitize every six months. This is because they use their water system a lot and face different water sources.
Prior to a Long Trip
Long trips mean traveling to places with unknown water quality. We sanitize before these trips to start with a clean system. This stops contamination from bad water sources.
Remote camping spots might not have good water testing. Starting with a sanitized system gives peace of mind when using unknown water. This is very important for traveling abroad.
In emergencies, water quality can be a big worry. A pre-sanitized system protects against contamination from emergency water.
| RV Usage Type | Sanitization Frequency | Key Triggers | Additional Notes |
|---|---|---|---|
| Weekend Campers | Annually (Spring) | Dewinterization, Storage | Before first seasonal use |
| Frequent Travelers | Every 6 Months | High usage, Multiple sources | Monitor water quality closely |
| Full-Time RVers | Every 6 Months | Constant use, Various locations | More frequent if needed |
| Storage Situations | After 2-4 Weeks | Stagnant water, Inactivity | Immediate sanitization required |
| Contamination Events | Immediately | Bad water source, Boil advisories | Emergency sanitization protocol |
Knowing how often to sanitize RV water tank systems keeps your water quality good. We follow these tips to avoid contamination problems.
Sanitize right away if you suspect contamination. This is true for systems under boil-water advisories or wells of unknown quality. Don’t wait for scheduled maintenance when you think there’s contamination.
Gathering Your Sanitizing Supplies
Getting ready is key for DIY RV water tank cleaning. The right tools make a big difference. Rushing can lead to bad cleaning or safety risks.
Keeping things organized is important. Make a sanitizing kit for your RV. It saves time and prevents forgotten items.
Essential Items You’ll Need
Start with the right tools for cleaning. We found some must-haves that make cleaning safer and better. You can find these at most stores.
A measuring cup is a must for the right bleach mix. Metal or glass is best, not plastic. Plastic can hold bleach smells and get weak.
You’ll need a flexible funnel for easy pouring. Pick one with a big opening to avoid spills. A 5-gallon bucket is good for mixing and storing water.
A potable water hose is very important. Don’t use a garden hose, as it can harm your water. Make sure your hose is clearly marked.
Recommended Sanitizing Solutions
Choosing the right cleaner is key. We suggest two good options for RV water systems. Both kill bacteria and remove odors.
Unscented household bleach is a top choice. Look for at least 5% sodium hypochlorite. Avoid colored, scented, or strong bleaches, as they can damage your system.
Commercial RV tank sanitizers are also good. Thetford’s kits are made for RVs. They come with easy-to-follow instructions and tools.
“The best sanitizer is the one you’ll actually use all the time. Whether it’s bleach or commercial products, regular cleaning keeps your water safe.”
Safety Gear for Sanitizing
Always wear protective gear when cleaning. This prevents skin contact with harmful chemicals. Even mild bleach can irritate skin if you’re exposed too long.
Rubber gloves are a must. Choose thick, chemical-resistant ones that cover your wrists. Don’t use disposable latex gloves for bleach.
Wear old clothes and shoes that you don’t mind getting stained. Bleach can ruin fabrics, and spills happen. Safety glasses are also good if it’s windy.
| Supply Category | Essential Items | Optional Upgrades | Estimated Cost |
|---|---|---|---|
| Measuring Tools | Glass measuring cup, flexible funnel | Digital scale for precise measurements | $15-25 |
| Containers | 5-gallon bucket, potable water hose | Water tank filler, extra storage containers | $30-50 |
| Sanitizing Solutions | Unscented bleach or RV sanitizer | Multiple sanitizer types for different needs | $10-20 |
| Safety Equipment | Rubber gloves, old clothing | Safety glasses, chemical-resistant apron | $15-30 |
Have all your supplies ready before you start. This prevents problems and keeps you safe. Keep everything in a maintenance kit for easy access. This way, you can keep your RV’s water system clean and safe every year.
Step-by-Step Guide to Sanitizing Your RV Water Tank
With your supplies ready, we’ll guide you through each step of sanitizing your RV water tank. This ensures your RV water system maintenance is done right and safely. It also protects your equipment from harm.
The sanitizing process needs careful attention and the right timing. Each step is important and must be done in the right order.
Preparing the Tank
Before we start sanitizing, proper preparation is key for safety and success. First, turn off your water heater completely. This is important because heating bleach can damage your tank and be dangerous.
Next, shut off your water pump to avoid damage during draining. Running the pump when tanks are empty can cause costly mechanical issues.
Find your fresh water tank drain valve under your RV. RVs use color codes: red caps for hot water and blue caps for cold water. Open these valves fully to drain both tanks.
Let gravity do the work and wait until all water is gone. This usually takes 10-15 minutes, depending on your tank size.
Mixing the Sanitizing Solution
Getting the right bleach ratio is key for effective sanitizing without harming your plumbing. Use these measurements based on your tank size:
| Tank Capacity | Bleach Amount | Water for Mixing |
|---|---|---|
| 16 gallons | 1/4 cup (2 ounces) | 1 gallon |
| 30 gallons | 1/2 cup (4 ounces) | 1 gallon |
| 40 gallons | 2/3 cup (5 ounces) | 1 gallon |
| 60 gallons | 1 cup (8 ounces) | 1 gallon |
Never pour undiluted bleach into your tank. It can harm your plumbing and rubber seals. Always mix bleach with at least one gallon of clean water first.
Use a clean container to mix the bleach with water. Stir gently to mix well without making too much foam.
Filling the Tank with Solution
Put your funnel in the fresh water inlet to avoid spills. Be careful not to spill bleach solution on your RV or clothes, as it can stain or damage.
Pour the diluted bleach solution slowly into your fresh water inlet. Be careful to avoid splashing.
After adding the solution, connect your potable water hose to the fresh water inlet. Fill the tank with clean water to dilute the solution well. You’ll know it’s full when water starts coming out of the tank vent.
This detailed approach to RV water system maintenance makes sure your water system is fully sanitized.
Distributing the Sanitizing Solution
Now that your tank is filled, it’s time to make sure the sanitizing solution gets everywhere. This step is key to making sure sanitizing RV water supply works well all over. You need to be careful and patient during this process.
By making sure the solution moves through all your water lines, you kill off bad bacteria. If you don’t get it everywhere, some spots might stay dirty.

Running Water Through the System
First, turn on your water pump to start moving the solution. Start with your kitchen faucet, using hot water for about three minutes. You’ll know it’s there when you smell bleach.
This smell means the solution has gone through your water heater and hot lines. Then, use cold water for one to two minutes to clean the cold lines.
By doing this step by step, you make sure every part of your RV’s water system gets treated. Never skip this step because not doing it means your sanitizing won’t work.
Turning On Faucets and Showers
Next, go through your RV and turn on every water outlet. Run each faucet, shower head, and toilet for about a minute on both hot and cold. Don’t forget places like ice makers and washing machine hookups.
Each one should smell like bleach before you move on. This means the solution has reached that spot in your plumbing.
“The goal is to smell bleach at every water outlet, confirming the sanitizing solution has reached all parts of your plumbing system.”
Don’t forget your outdoor shower if you have one. These spots often get missed but need the same treatment as inside.
Letting It Sit for Required Time
After you’ve checked that all outlets smell like bleach, turn off all faucets and your water pump. The solution needs to sit for twelve to twenty-four hours to work best.
This time lets the solution kill off bacteria, mold, and other bad stuff. Start this in the evening so it works while you sleep.
Never let it sit more than twenty-four hours because it can harm your RV’s plumbing. The shortest time it works is four to five hours, but longer is better.
While it sits, don’t use any water from your RV. Have bottled water ready for drinking and other needs.
Flushing the RV Water System
Flushing your RV water system is key to getting safe, clean drinking water. It removes all sanitizing solution, finishing your RV water tank cleaning. We’ll guide you through each step to make sure your water tastes fresh and is safe.
Draining the Sanitizing Solution
After 12-24 hours, it’s time to drain the chlorinated water. Turn on your water pump and open all faucets at once. This lets the sanitizing solution flow out.
The draining takes 10-20 minutes, depending on your tank size. Direct the flow to your gray water tank if connected to sewer. This is for proper disposal.
If not connected to sewer, collect the solution in containers. Take these to an RV dump station for disposal. Never let bleach solution drain onto the ground as it can harm plants and soil.
Rinsing the Tank Thoroughly
After emptying your tank, fill it with fresh, clean water. Use a high-quality water filter for the cleanest water.
Run water through all faucets and outlets in your RV. This includes:
- Kitchen sink and faucet
- Bathroom sink
- Shower head
- Toilet (if connected to fresh water)
- Any outdoor spigots
Keep running water until you can’t smell bleach anymore. This step is key for RV water tank maintenance and may need 2-3 cycles.
Ensuring No Residual Odor Remains
Your water is ready when it tastes and smells normal. Test water from each faucet to ensure cleaning.
If you smell bleach after multiple flushes, don’t worry. Fill your tank again and let fresh water sit for hours. Then drain and refill. This extra step ensures complete removal of any remaining sanitizing solution.
Your RV water system is now sanitized and ready for use. The flushing process makes sure your RV water tank cleaning is complete. Your water is safe for drinking, cooking, and bathing.
Maintenance Tips for RV Water Tanks
It’s smart to have a regular maintenance plan for your RV water system. Best practices for RV water tank sanitization go beyond just cleaning. Keeping up with maintenance stops contamination and keeps your water clean on trips.
There are three key areas to focus on for RV water system maintenance. Each part is important for clean water and a long-lasting system. Let’s look at these important steps to keep your water safe and clean.

Regular Cleaning Schedule
Having a set cleaning schedule is key for water tank care. Seasonal RVers should sanitize annually, and full-time travelers should do it every 6 months. Mark these dates on your calendar to never forget.
How often you use water and the water quality you use affects your cleaning needs. Keep a record of each sanitization date to track your system’s health.
If your water tastes bad, smells funny, or looks off, clean it right away. Don’t wait for your scheduled cleaning. Quick action stops health risks and damage.
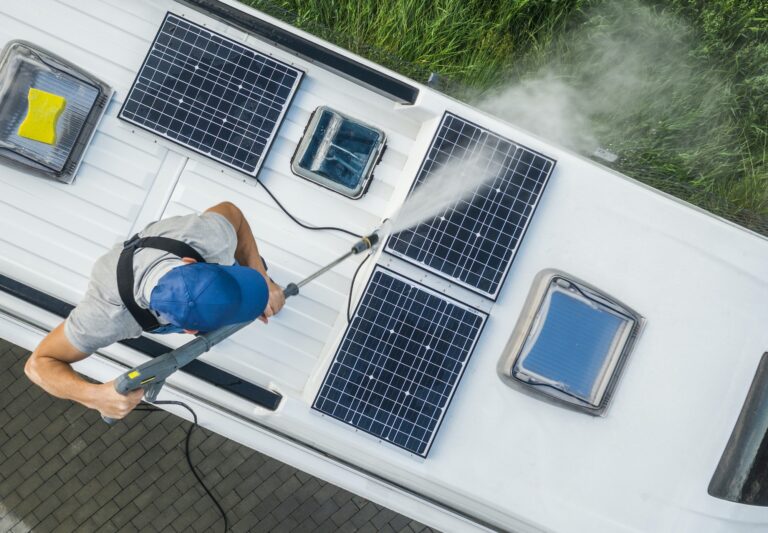
Using Quality Water Filters
Good external water filters are your first defense against bad stuff. Put them on every time you use campground water or fill your tank. They remove sediment, chlorine, and harmful substances before they get to your system.
Change filters every 3-6 months, as the maker says. After cleaning your best practices for RV water tank sanitization process, put in new filters. The cleaning solution can mess up or clog old filters.
Think about getting a multi-stage filter system for better protection. These systems remove more contaminants and can improve taste and smell.
Checking for Leaks and Damage
Check your water system parts every month to catch small problems early. Look at hose clamps, fittings, and connections for leaks. Loose connections can let contaminants in your clean system.
Make sure the fresh water tank filler hose clamp is tight. RVs often come with it loose. Tighten all connections and replace any broken parts right away. RV water system maintenance also means checking the water heater’s anode rod if you have one.
Water heaters need anode rod replacement every 1-2 years, based on water quality and use. This simple step stops tank corrosion and makes your water heater last longer.
| Maintenance Task | Frequency | Key Focus Areas | Expected Duration |
|---|---|---|---|
| System Inspection | Monthly | Hose clamps, fittings, connections | 15-20 minutes |
| Filter Replacement | Every 3-6 months | External and inline filters | 10-15 minutes |
| Anode Rod Check | Annually | Water heater corrosion prevention | 30-45 minutes |
| Full Sanitization | 1-2 times yearly | Complete system disinfection | 2-3 hours |
Keeping detailed records of maintenance helps track your system’s health. Note down sanitization dates, filter changes, and any issues found. This proactive approach keeps your water system reliable and safe on your travels.
Troubleshooting Common Issues
When RV water tank cleaning doesn’t go as planned, we can help. Even the best cleaning can leave some problems behind. Most issues have simple fixes that we can find together.
Water system problems need special solutions. They can come from mineral buildup, bacteria, or wear and tear. Sometimes, the cleaning itself can cause issues like air in lines or chemical smells.
Persistent Odor After Sanitizing
Odors that won’t go away after cleaning often mean biofilm or bacteria. Try a second cleaning with a bit more bleach. Use 1/2 cup of bleach for every 15 gallons of water.
If you smell chlorine, try vinegar. Mix one quart of white vinegar with five gallons of water. It gets rid of chlorine smells and mineral buildup.
Problems might not be in the tank but in the water heater or pipes. Run hot water through all faucets for a few minutes. This clears out any old water.
Water Pump Problems
Water pump issues after DIY RV water tank cleaning often come from air in the lines. Prime your pump by running water until it flows smoothly.
Check all connections for leaks. Loose or damaged seals can cause problems. Tighten connections carefully to avoid damage.
If the pump keeps cycling, the pressure switch might need adjusting. This is best done by a professional to avoid damaging the pump.
Stains in the Tank
Stains in the tank might need special cleaners. Avoid harsh chemicals that can harm the tank.
For mineral stains, use RV-safe cleaners. These products remove calcium and iron without damaging the tank.
Bad tastes might mean it’s time to change your water filters. Even after cleaning, old filters can contaminate your water.
| Problem | Likely Cause | Solution | Prevention |
|---|---|---|---|
| Chlorine smell remains | Residual sanitizer | Vinegar flush | Thorough rinsing |
| Pump won’t prime | Air in lines | Run water continuously | Check connections |
| Brown water stains | Iron deposits | RV-safe cleaners | Quality water sources |
| Musty odor persists | Biofilm buildup | Repeat sanitization | Regular cleaning schedule |
Some problems need a pro at an RV repair shop. If you can’t fix it yourself, get help from certified technicians. They have the tools and know-how to solve complex problems safely.
Best Practices for Water Tank Management
Smart RV owners know that taking care of their water system is key. It keeps costs down and health safe. By following best practices for RV water tank sanitization, your family can enjoy clean water on the go. We’ve got tips to keep your water quality high and your system running long.
Managing water well is more than just cleaning. It’s about knowing your water sources, storing it right, and keeping up with care. These steps help keep your water system healthy.
Safe Drinking Water Storage
Always use potable water sources to fill your tank. Stay away from wells, streams, or untested water that could harm your system. Public water and certified RV parks are the safest choices.
Use your stored water often to keep it fresh. Refill frequently to avoid stagnant water. Stagnant water is perfect for bacteria and bad smells.
Think about getting water testing kits. They help find problems early, which is key when traveling to new places.
Understanding Water Source Quality
Check the water quality at your destinations before you go. Some areas have minerals or chemicals that change taste or need more cleaning. Local reports can tell you what to expect.
Keep records of your water sources and any issues. This helps spot patterns and prevent future problems. Document sanitization dates and any changes in taste or appearance.
Always have emergency water and purification tablets ready. They ensure you have safe water, no matter what.
Seasonal Maintenance Checklist
Make a detailed seasonal maintenance plan. It should cover how often to sanitize RV water tank systems all year. Each season brings its own challenges and care needs.
Spring preparation means a full sanitization and dewinterization. Summer is for filter changes and system checks. Fall is for partial sanitization before storage. Winter needs draining and freeze protection.
Keeping the right temperature is key. Don’t fill with very hot water, and protect from freezing. Freezing can damage parts and let in contaminants.
- Spring: Complete sanitization and system startup
- Summer: Monthly filter checks and water quality testing
- Fall: Pre-storage sanitization and system preparation
- Winter: Proper draining and freeze protection measures
Conclusion and Final Thoughts
We’ve shown you how to sanitize your RV water tank. This helps keep your water safe while traveling. It’s important for your family’s health on camping trips.
Why Regular Water Tank Care Matters
Sanitizing your RV water stops harmful bacteria and bad tastes. Clean tanks mean safer water and better trips. You likely have all the needed supplies already.
Regular cleaning keeps you healthy and your tank working longer. Clean water makes cooking, cleaning, and drinking better on the road.
Building Healthy Water Maintenance Habits
Make a schedule for water tank care based on your trips. Mark dates on your calendar to stay on track. Do it before camping, after storage, and before long trips.
Have quality water filters ready. Check your system for leaks or damage often. Keep a record of your maintenance to spot problems early.
Your RV’s water system needs care like any other part. With the right care, it will serve you well for many adventures.