Every year, thousands of RV owners face a harsh reality. Water dripping from their ceiling is the start of a nightmare. RV roof leaks are not just minor problems we can ignore.
These small issues quickly turn into big disasters. Water damage harms wood framing and causes dangerous mold. Your electronics get ruined, and ceilings sag under trapped moisture.
RVs can lose thousands of dollars in value if leaks are ignored. A small drip can lead to needing a new roof in months.
The good news is that RV roof leaks can be prevented. With the right maintenance and prevention, we can protect our investment. This keeps our families safe from water damage and health hazards.
Key Takeaways
- Water damage from roof leaks can destroy wood framing and create dangerous mold growth
- Even minor leaks can escalate into major structural problems requiring expensive repairs
- Roof leaks significantly reduce your RV’s resale value if left untreated
- Regular maintenance and inspection are key for early leak detection
- Prevention is far more cost-effective than reactive repairs
- Proper sealing and weatherproofing can prevent most common leak sources
Understanding RV Roof Leaks
Knowing how to prevent RV roof leaks is key to keeping your RV in top shape. We’ve seen many RV owners face costly repairs. By understanding leaks, you can avoid these problems and travel without worry.
Water damage is a big threat to your RV. A small leak can turn into a big problem, costing thousands of dollars. It’s important for every RV owner to know how roof failures happen.
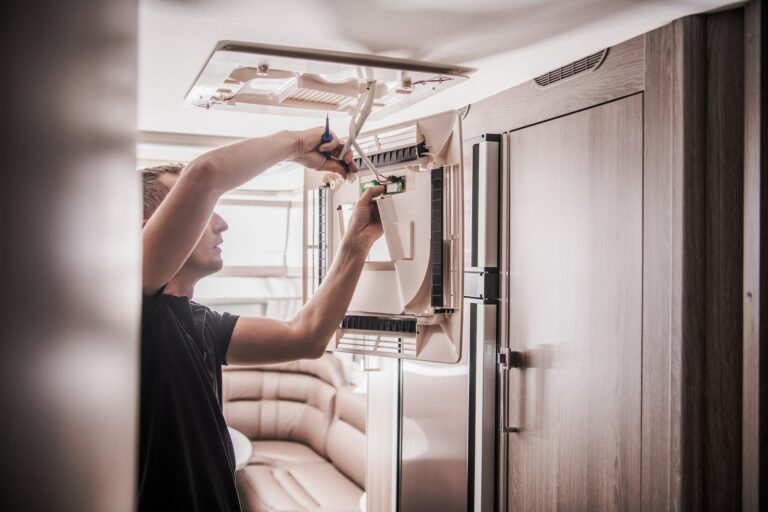
What Causes RV Roof Leaks?
Most RV roof leaks come from two main causes. The first is improperly sealed rooftop objects and failed sealant around roof penetrations. These include air conditioners, vents, skylights, and antenna mounts.
Sealant around these areas can wear out over time. UV rays and temperature changes cause it to break down. This creates gaps where water can get in. Many owners miss these spots during checks.
The second cause is punctures in the roof membrane. Things like tree branches, hail, or debris can make holes. Even walking on the roof with the wrong shoes can damage it.
Weather can make these problems worse. Heat makes sealants brittle, and cold can crack them. Knowing how to stop leaks starts with spotting these weak spots.
Common Signs of a Roof Leak
Spotting leaks early saves money and prevents big damage. Water stains on ceilings and walls are clear signs. These stains are often brown or yellow.
Soft spots in ceilings or walls mean water is getting in. Pressing on these spots can show if they’re soft. This softness means water has damaged the material.
Look for brown, black, or green areas that mean mold is growing. Mold loves damp places and can show up fast. A musty smell often comes with mold.
Damaged flashing around roof penetrations is another warning sign. Flashing should fit flat and smooth. If it’s cracked or missing, you need to fix it right away.
Delamination happens when the outer skin of your RV separates from the inside. This creates bubbles or waves on the outside. Delamination often comes from too much water.
Impact of Delayed Repairs
Waiting to fix roof problems leads to more issues and higher costs. Wood rot happens when moisture gets into wooden parts. Once it starts, it spreads fast.
Mold is a health risk. Some mold types can cause breathing problems and other health issues. Fixing mold costs a lot more than just the repair.
Ignoring repairs can make your RV unsafe. Water can weaken the structure, making it unsafe to drive. In bad cases, it can make your RV unusable.
We’ve seen a $50 fix turn into a $10,000+ rebuild. The cost of not maintaining your RV is much higher than fixing it early.
Insurance can be a problem if you wait too long to fix things. Many policies don’t cover damage from neglect. Keeping up with RV roof maintenance helps keep your insurance valid.
Time is also important. Emergency repairs while traveling are costly and stressful. Finding good repair services in new places adds to the hassle.
How RV Roof Types Affect Leak Risks
Not all RV roofs are the same. Each type has its own strengths and weaknesses when it comes to leaks. Knowing these differences helps you take better care of your RV and avoid costly repairs.
We’ll look at the three main types of RV roofs. Each has its own benefits and challenges that affect how well it protects your RV from the weather.
Differences Between Rubber, Fiberglass, and Metal Roofs
EPDM rubber roofs are very common because they’re light and affordable. They cover the whole roof, which means fewer seams where leaks can happen. But, they can get damaged by tree branches and UV rays.
TPO rubber roofs are newer and more durable than EPDM. They need more seams, which can be weak spots for leaks over time.
Fiberglass roofs are very durable and weather-resistant. They’re made in one piece, which means fewer seams and less chance of leaks. They’re also easy to clean and maintain.
Aluminum roofs last a long time and are very resistant to damage. But, they’re made of many panels, which can lead to leaks at the seams.
Pros and Cons of Each Roof Type
Rubber roofs are flexible and affordable. They’re easy to fix and not too expensive to replace. But, they can get punctures and need regular checks.
Fiberglass roofs are durable and need little maintenance. They don’t crack or need frequent sealing. But, they cost more upfront and repairs can be pricey.
Metal roofs last a long time and protect well against bad weather. They’re hard to puncture and can handle snow. But, finding leaks early can be hard because water can travel along the metal.
| Roof Type | Durability | Maintenance | Repair Cost |
|---|---|---|---|
| EPDM Rubber | 10-15 years | High | Low |
| TPO Rubber | 15-20 years | Medium | Medium |
| Fiberglass | 20-25 years | Low | High |
| Aluminum | 25+ years | Medium | Medium |
Choosing the Right Roof for Your RV
Choose a roof that fits your RV use and maintenance style. If you travel a lot, fiberglass or aluminum might be best. But, if you mostly use your RV on weekends, rubber could be fine.
Think about how much maintenance you’re comfortable with. Rubber roofs need more care but are easier to fix. Fiberglass and metal need less upkeep but might need a pro for repairs.
Cost is also important. Rubber roofs are cheaper but might need more repairs. Choosing better materials can save money in the long run and protect your RV.
Consider your travel area’s weather when picking a roof. Sunny places need roofs that resist UV rays. Wet areas need roofs with no seams. Cold places need roofs that don’t crack from freezing.
It’s wise to talk to RV experts. They can help you choose the best roof for your needs and avoid costly mistakes.
Essential Maintenance Practices
We think regular maintenance is key to avoiding expensive roof leaks. Preventing water damage in RV systems starts with regular care routines. These routines catch problems early, saving you money.
Include both scheduled checks and quick fixes for any issues. This keeps your RV in great shape and makes it last longer.
Regular Inspections: What to Look For
Do a RV roof inspection at least twice a year if you use your RV on weekends. If you live in it full-time, check it every three months. Spring and fall are the best times for these checks.
Start with interior checks because they’re safer. Look for water stains and soft spots on ceilings and walls. Soft spots mean water damage.

Also, check behind furniture and in storage areas. Water can hide before you see it. Mold growth is a sign of moisture problems.
For exterior checks, use a safe ladder and have someone watch you. Never go on the roof in wet or windy weather. Move carefully to avoid damage.
| Inspection Area | What to Check | Warning Signs | Frequency |
|---|---|---|---|
| Roof Sealants | Cracks, gaps, or separation | Visible cracks, peeling edges | Every 6 months |
| Vent Penetrations | Seal integrity around openings | Loose or missing sealant | Every 6 months |
| Roof Membrane | Tears, punctures, or wear | Visible damage, thin spots | Every 6 months |
| Interior Ceiling | Water stains, soft spots | Discoloration, sagging | Monthly |
Cleaning Your RV Roof
Cleaning your roof regularly stops debris buildup. This prevents moisture damage. Clean your roof at least three times a year, more if you park under trees or in dusty areas.
First, remove loose debris like leaves and dirt. Use a soft-bristled brush or broom. Never use pressure washers on RV roofs because they can cause leaks.
Choose cleaners made for your roof type. Rubber roofs need different cleaners than fiberglass or metal. Always follow the instructions and test in a small area first.
Clean in sections, applying cleaner and scrubbing gently. Rinse well with a garden hose. Pay extra attention to vents and air conditioning units.
Importance of Immediate Repairs
Fix damage right away during your RV roof inspection. A small crack can quickly grow, leading to big problems. Water can damage your RV’s interior a lot.
Preventing water damage in RV interiors means acting fast. Water damage spreads quickly. A small leak can cost thousands if not fixed.
Keep emergency repair supplies ready for quick fixes. Temporary patches can stop leaks until you can fix it for good. But remember, they’re only temporary. Fix it properly as soon as you can.
Take photos of any damage before fixing it. This helps with insurance claims and shows your RV’s maintenance history. Take pictures from different angles and close-ups.
Small repairs like resealing vents or patching the roof can be DIY. But big problems need a pro. Don’t be afraid to ask for help when you’re not sure.
Protective Coatings and Treatments
Protective coatings make maintenance more effective. The right products prevent leaks and save money on repairs. They shield your RV from weather, UV rays, and temperature changes.
The market has many options, but not all work with RV roofs. Choosing the wrong sealant can make repairs harder and more expensive. We focus on RV-specific solutions that work with rubber, TPO, and other materials.
Sealants: Types and Applications
Finding the best RV roof sealant depends on your roof type and needs. Dicor Self-Leveling Lap Sealant is the industry standard for most RVs. It bonds well with EPDM rubber and TPO.
We advise against silicone-based sealants for RV roofs. They don’t bond well with rubber or TPO. Even worse, silicone contamination makes future repairs nearly impossible because new sealants won’t stick to silicone residue.
Here are the main sealant categories we recommend:
- Self-leveling sealants – Perfect for horizontal surfaces and seams
- Non-sag sealants – Ideal for vertical applications and corners
- Butyl tape – Excellent for initial installations and permanent seals
- Polyurethane sealants – Durable option for high-stress areas
How you apply the sealant is as important as the product itself. Clean surfaces before applying. Remove old, cracked material completely. A proper application in good conditions will last 3-5 years with regular inspection.
Benefits of Roof Coatings
Roof coatings offer more protection than sealants alone. They create seamless barriers across your roof. Think of coatings as insurance policies that protect your investment.
UV protection is key. Constant sun exposure damages roofing materials and sealants. Quality coatings reflect heat and block harmful UV rays. This can extend your roof’s lifespan by 10-15 years.
“A good roof coating system can save RV owners thousands in premature roof replacement costs. The key is choosing products designed for RVs and following proper application procedures.”
Temperature regulation is another big advantage. Reflective coatings can reduce interior temperatures by 10-15 degrees in hot weather. This saves on air conditioning costs and improves comfort.
Waterproofing capabilities seal minor imperfections and provide uniform protection. Coatings fill small cracks and gaps that might allow water penetration. They also move with your RV during travel.
When to Reapply Protective Layers
Timing reapplication correctly prevents problems before they start. Most RV roof sealants need attention every 2-3 years, depending on climate and usage. Harsh conditions like desert heat or frequent rain accelerate deterioration.
Visual inspection reveals when reapplication is needed. Look for these warning signs during regular roof checks:
- Cracking or shrinking sealant beads
- Discoloration or chalking on coated surfaces
- Peeling or bubbling protective films
- Exposed substrate showing through coatings
Seasonal timing affects application success. Spring and fall offer ideal conditions with moderate temperatures and low humidity. Avoid applying products during extreme weather or when rain threatens within 24 hours.
UV protectant sprays need special attention in maintenance schedules. These products break down faster than sealants and coatings. Plan to reapply UV protectants annually in sunny climates or every 18 months in moderate conditions.
Keep detailed records of application dates and products used. This helps track performance and plan future maintenance. Proactive reapplication costs far less than emergency repairs caused by failed protective systems.
Weather patterns in your travel areas influence reapplication frequency. RVs used in coastal areas need more frequent attention due to salt air exposure. Desert travelers should focus on UV protection and heat-related expansion issues.
Weather Considerations and Their Impact
Mother Nature presents unique challenges for RV owners. Each climate zone has its own threats to roof integrity. Understanding these environmental factors helps us protect our investment.
Weather conditions affect how quickly roof materials deteriorate. They also determine when repairs are needed.
The relationship between climate and roof damage is complex. Different regions stress RV roofs in different ways. The Truth About RV Roof Leaks often involves recognizing these regional differences.
How Climate Affects RV Roofs
UV exposure in sunny climates breaks down sealants faster than expected. The sun’s rays make rubber seals brittle and crack over time. Desert regions are harsh, with temperatures over 120°F on roof surfaces.
Temperature changes stress roof materials. Metal roofs expand in heat and contract at night. This movement can loosen fasteners and let water in.
Cold climates have their own challenges. Freeze-thaw cycles make damage worse. Snow loads can also stress roof structures.
“We learned the hard way that different climates require different maintenance schedules. What worked in Florida didn’t work in Colorado.”
Humidity levels slow drying after moisture exposure. High humidity areas are prone to mold and rot. Coastal regions add salt air corrosion to the list of concerns.
Preparing Your RV for Seasonal Changes
Spring preparation involves thorough inspections after winter storage. We check all seals, clean debris from gutters, and look for damage from ice or snow. This is when we apply fresh sealant to areas showing wear.
Summer readiness focuses on UV protection and ventilation. Installing roof vents helps reduce interior heat buildup. We also apply UV-resistant coatings to extend material life in sunny climates.
Fall preparations center on weatherproofing before harsh winter conditions arrive. We ensure all penetrations are properly sealed and drainage systems work correctly. RV roof leak prevention tips emphasize the importance of this seasonal maintenance routine.
Winter storage requires specific steps to prevent freeze damage. We remove all standing water from roof areas and ensure proper ventilation to prevent condensation buildup. Covering the RV protects against snow loads and ice formation.
Tips for Long-Distance Travel
Route planning becomes critical when considering roof protection during travel. We avoid low-hanging branches by researching our path ahead of time. Tree-lined campgrounds require extra caution during setup and departure.
Post-storm inspections should happen immediately after severe weather encounters. Hail damage may not be immediately visible but can compromise roof integrity. We carry a ladder and flashlight for quick damage assessments.
Altitude changes affect how our RV responds to temperature variations. Mountain travel exposes roofs to more intense UV radiation and sudden weather changes. We adjust our maintenance schedule when spending extended time at high elevations.
Regular cleaning during travel prevents debris accumulation that can trap moisture. We remove leaves, twigs, and other materials that collect in roof valleys. This simple step prevents many water intrusion problems before they start.
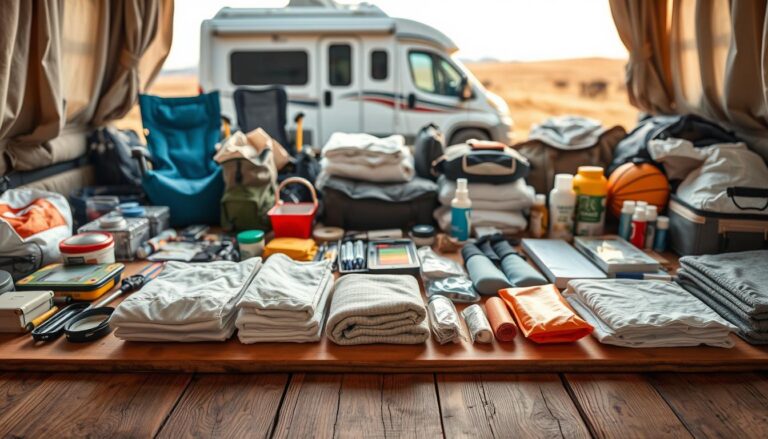
Emergency repair supplies become essential for long-distance travelers. We carry temporary patch materials and basic tools for quick fixes. Having these supplies available prevents small problems from becoming major leaks during extended trips.
Expert Tips for Preventing Roof Leaks
Learning how to prevent RV roof leaks can save you a lot of money. It’s more than just cleaning and checking. It’s about using advanced techniques.
RV experts focus on three main areas. They use the right storage, ventilation, and pre-trip checks to keep roofs leak-free.

Storage Solutions That Protect Your Investment
Storing your RV right is key to avoiding roof damage. Breathable RV covers protect from UV rays and let moisture out.
Don’t use plastic tarps or covers that don’t breathe. They trap moisture, leading to mold and seal damage. Breathable covers might cost more but save you money in the long run.
Always park on level ground to avoid roof stress. Uneven surfaces can damage seals. Use leveling blocks for proper drainage and to reduce stress.
Ventilation Systems That Prevent Problems
Good ventilation stops condensation that causes leaks. Proper air circulation keeps humidity levels right, preventing damage.
Put roof vents in the right spots for cross-ventilation. This stops hot spots that harm materials and seals. Many don’t realize how much condensation builds up.
Make sure vent fans work well. Clean them to keep air flowing. Replace old fan motors to avoid being stuck without ventilation.
Pre-Trip Inspections That Catch Issues Early
Do thorough checks before you leave to find problems early. RV roof maintenance means looking at all seals, after bad weather.
Make a list for each roof point, like vents and mounts. Look for any signs of damage or wear.
Watch roof edges and corners closely. They’re the first to fail. Take photos to track any changes and spot problems early.
Damage from weather often shows up slowly. Check your roof after storms or extreme weather. Catching small issues early saves you from big repairs and damage inside.
Identifying and Using Repair Kits
Dealing with a leaky RV roof can be tough. But, the right repair kit can make a big difference. Not every RV owner is ready to tackle RV roof repair projects. Yet, with the right tools and materials, most problems are easy to fix.
Knowing what materials to use is key. Different leaks need different fixes. Having the right tools means you’re ready for any problem that comes up.
Essential Tools and Materials
Every RV owner should have a good repair kit. Start with EternaBond tape for quick fixes. It sticks well to most RV roofs and works in many weather conditions.
Your kit should also have various sealants for RVs. Dicor self-leveling sealant is great for vents and air conditioners. For rubber roofs, use Geocel ProFlex RV sealant, which stays flexible in cold or hot weather.
Don’t forget tools for getting ready the surface. A soft-bristle brush removes dirt without harm. Denatured alcohol cleans the roof before new sealants. Use putty knives with flexible blades for smooth repairs.
Safety gear is also important. Wear non-slip shoes and gloves to protect yourself. A headlamp helps with repairs in the dark.
Step-by-Step Guide for DIY Repairs
Fixing a leaky RV roof starts with checking the damage. Clean the area with denatured alcohol and let it dry. Then, remove old sealant with a putty knife carefully.
For small holes or tears, use EternaBond tape. Cut it big enough to cover the damage on all sides. Press the tape firmly and smooth it out with a roller or your hands.
Bigger repairs or failed sealant need a different method. Apply sealant in thin, even layers. Self-leveling sealants are best for flat areas, while non-sag ones work for vertical ones.
Weather affects repairs a lot. Try to avoid working in very cold or hot temperatures. High humidity can slow down curing, so pick dry days for repairs.
After fixing, let the area dry completely before using it again. Most sealants need 24-48 hours to fully cure. Test your repair with water before you’re sure it’s fixed.
Professional Repair Services: When to Call
When roof damage puts your safety at risk, it’s time to call the pros. DIY fixes are okay for small problems, but big issues need expert help. Preventing water damage in RV systems means knowing when to ask for help.
Choosing between DIY and a pro depends on safety and how complex the issue is. Water damage near electrical parts is very dangerous. It’s best left to trained experts. Structural damage also needs special skills and tools that most RV owners don’t have.
Warning Signs That Demand Professional Help
Some signs clearly show when you need a pro. Water leaks near electrical parts are a big no-no. They can cause fires and electrocution.
Soft or saggy roof spots in many places mean serious damage. This damage often goes deep, making the roof weak. A pro RV roof inspection can tell if you can fix it or need a new roof.
If leaks keep coming back after you try to fix them, it’s time for a pro. DIY fixes that don’t work can make things worse. This can also cost more money.
Visible damage like cracked supports or a sagging ceiling is a big warning sign. These problems are serious and need special care. They can make your RV unsafe.
Selecting Quality Repair Services
Choosing the right service is key to good repairs. Check if the technicians are certified by RV makers or groups like RVIA. This ensures they know what they’re doing.
Ask about their experience with your RV type. Different RVs are built differently. Good technicians know this. Ask for references and call them to check.
Make sure the repair service has insurance. This protects you if something goes wrong. It’s a safety net.
Get detailed estimates from several services before deciding. Good services give full plans for repairs. Preventing water damage in RV systems means doing it right, not just fast.
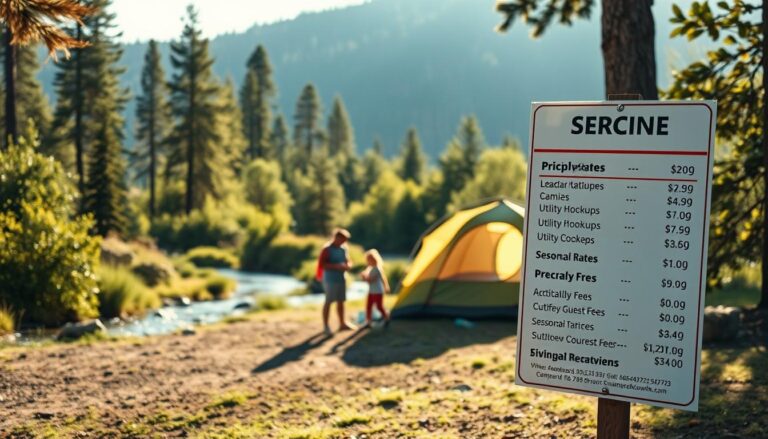
Understanding Professional Repair Costs
RV roof repairs can cost between $300 and $1,500. This depends on how bad the damage is and how hard it is to fix. Small leaks might just need a sealant, but big problems need more work.
Many things can change the cost of repairs. The size of the roof and how easy it is to get to affect the price. Emergency repairs are usually more expensive than planned ones. Regular RV roof inspection can save money in the long run.
Think about the cost of a new roof when looking at repair prices. If fixing it would cost more than half of a new roof, it might be better to replace it. A pro can help you decide.
Many repair services offer payment plans or loans for big jobs. Don’t worry about the cost too much. Water damage gets worse fast and costs more to fix. Getting professional repairs now can save you money later.
The Role of Insurance in Roof Leaks
Many RV owners find out too late that their insurance doesn’t cover roof damage. The truth about RV roof leaks goes beyond just fixing them. It’s also about knowing how insurance works for these problems.
Insurance policies often make a big difference between sudden accidents and slow damage. This can mean a lot of money saved or lost. Most RV insurance doesn’t cover damage from not taking care of your RV.

Understanding RV Insurance Coverage
How RV insurance covers roof leaks depends on the damage cause. Sudden and accidental damage like hail or falling trees is usually covered. But, damage from old sealants or AC gaskets is not.
Insurance splits roof damage into two types. Covered perils are things like weather damage or vandalism. Excluded perils are wear and tear, slow damage, and neglect.
It’s important to read your insurance policy carefully. Look for words like “sudden and accidental” and “maintenance exclusions.” These words decide if your claim is approved or not.
“Insurance is for unexpected events, not for regular maintenance. RV owners need to know this to avoid being disappointed with claims.”
Filing Claims for Roof Damage
When you file a claim for roof damage, having proof is key. Take photos of your roof during inspections. This shows you’ve been taking care of it and helps with claims for sudden damage.
Call your insurance right away after finding damage. Quick reporting shows you’re responsible and helps stop more damage. Give them photos, maintenance records, and any receipts for best RV roof sealant or repairs.
Insurance adjusters will check the damage’s cause and when it happened. They look for signs of neglect versus sudden damage. Having proof of regular roof care helps your claim.
Be ready for claim denials if the damage looks like it’s from neglect. Insurance companies need proof of sudden damage, not slow damage over time.
Preventive Coverage Options
Some insurance offers extra coverage for RV roofs. These policies might cover some maintenance issues or increase repair limits. Preventive coverage costs more but offers more protection.
Think about umbrella policies that cover more than standard RV insurance. These might include maintenance damage that regular insurance doesn’t. Look at different insurers’ roof coverage before buying.
Prevention is cheaper than insurance claims. Using good sealants and keeping up with maintenance saves money. It’s better than dealing with insurance deductibles and gaps.
Keep records of all maintenance with photos and receipts. This helps with future claims and shows you’re a responsible owner. Keep records of inspections, sealant use, and repairs.
Remember insurance is a backup, not a replacement for good RV roof care. The best way to protect your RV is with good insurance and regular maintenance.
Real-Life Stories: RV Roof Leak Experiences
Real-life stories teach us a lot. RV owners share their RV roof leak prevention tips. Their experiences show the bad effects of neglect and the good of taking care of your RV.
Many RVers find damage too late. Water damage can sneak into walls and floors before you see it inside.
Lessons Learned From RV Owners
Sarah from Colorado learned the hard way about how to prevent RV roof leaks. She ignored small stains for months. When she checked, water had been leaking for over a year.
“I thought it was just condensation,” Sarah says. “By the time I realized it was a leak, the repair bill was $8,000.” Her story shows early detection saves a lot of money.
Mike from Texas found his roof problem during an inspection. He noticed it felt soft and made a crunching sound. The damage was so bad he had to replace the roof.
Regular roof checks are key. Many owners now check their roofs every month. This way, they catch problems early and avoid big expenses.
Costly Mistakes to Avoid
RV owners make mistakes that cost a lot. We’ve found the most expensive errors. Knowing these helps you avoid them.
Using the wrong sealant is a big mistake. Many use whatever caulk they find. But RV roofs need special sealants for their materials and temperature changes. The wrong ones fail fast.
Ignoring the manufacturer’s maintenance schedule is another mistake. Some think their roofs don’t need maintenance for years. But neglecting seals leads to leaks. Regular resealing every 2-3 years stops most problems.
Pressure washing is also a mistake. It forces water through small gaps in seals. Many owners get leaks right after washing their RVs. Gentle cleaning is better.
| Common Mistake | Typical Cost | Prevention Method | Frequency |
|---|---|---|---|
| Wrong sealant type | $2,000-$5,000 | Use RV-specific products | Very Common |
| Delayed repairs | $3,000-$8,000 | Address issues immediately | Extremely Common |
| Pressure washing damage | $1,500-$4,000 | Use gentle cleaning methods | Common |
| Skipping inspections | $4,000-$10,000 | Monthly roof checks | Very Common |
Success Stories of Repair and Prevention
Learning how to prevent RV roof leaks pays off. Success stories show the value of taking care of your RV early.
Janet from Florida has had her RV for 15 years without a leak. She checks it monthly and gets annual maintenance. She spends $300 a year on care but saves thousands.
“I treat my RV roof like my car’s engine,” Janet says. “Regular maintenance prevents major problems.” She cleans debris monthly, checks seals quarterly, and reappplies coatings every three years.
Tom from Arizona caught a small leak before his trip. He fixed it with temporary sealant and had it professionally repaired for $150. His quick action saved thousands.
A retired couple from Oregon has a leak-free RV. They follow the manufacturer’s guidelines and fix any problems right away. Their 10-year-old RV has its original roof in great shape.
These success stories share common traits. They all do regular checks, fix problems fast, and use quality materials. Owners who prevent leaks enjoy worry-free travel and higher resale values.
The most successful owners have a maintenance routine. They know roof care is ongoing, not a one-time thing. This approach protects their investment and ensures years of trouble-free RV adventures.
Resources for RV Owners
We know keeping your RV roof in top shape is a big job. Building a network of reliable contacts and information sources is key. The RV community offers great support through online platforms, educational websites, and professional services. These help prevent water damage in RV systems.
Having the right resources makes tough maintenance tasks easier. We’ve gathered essential resources for your RV roof maintenance journey.
Helpful Online Communities
Online RV communities offer great support and advice. They connect you with thousands of RV fans who share tips and solutions.
RV.net Forums is a big and active RV community online. Members talk about roof maintenance, share repair stories, and give advice on preventing water damage.
iRV2 Forums focuses on technical discussions and maintenance tips. It’s great for step-by-step repair guides and product comparisons. Members often post photos of their repair projects.
Facebook groups like “RV Maintenance and Repair” and “RV Living Full Time” offer quick support. They help with urgent roof issues on the road.
Useful Websites and Guides
Comprehensive websites and guides give you the technical knowledge for RV roof maintenance. They offer structured learning and reference materials for all levels.
RV Repair Club has video tutorials and written guides for every RV maintenance need. Their roof repair section includes detailed instructions for different roof types and sealant applications.
Camping World’s Resource Center provides manufacturer-specific maintenance guides and product recommendations. They cover seasonal maintenance, product comparisons, and troubleshooting guides for common roof problems.
The Recreation Vehicle Industry Association (RVIA) website offers official maintenance standards and safety guidelines. Their resources include manufacturer contacts, warranty information, and industry best practices for preventing water damage in RV systems.
YouTube channels like “RV Geeks” and “Keep Your Daydream” offer visual learning opportunities. They have detailed repair demonstrations and maintenance walkthroughs.
Recommended Repair Professionals in the U.S.
Professional repair services offer expert help when DIY maintenance isn’t enough. Choosing qualified professionals ensures proper repairs and keeps your RV’s warranty valid.
Good Sam RV ProCare offers mobile repair services across the United States. Their certified technicians provide on-site roof repairs, inspections, and maintenance services. They specialize in emergency repairs and complete roof restoration projects.
Camping World Service Centers operate nationwide with trained RV technicians. Their service departments handle routine maintenance to major roof repairs, with access to manufacturer-specific parts and materials.
Local RV dealerships often provide the most convenient service options. Many have mobile service units that can perform RV roof maintenance at your location, saving you from transporting your RV to a service center.
| Service Type | Best For | Average Cost Range | Availability |
|---|---|---|---|
| Mobile Repair Services | Emergency repairs, convenience | $150-$400 per visit | Most major cities |
| RV Dealership Service | Warranty work, complete repairs | $100-$300 per hour | Regional coverage |
| Independent RV Specialists | Custom work, competitive pricing | $75-$200 per hour | Local markets |
| Manufacturer Service Centers | Complex repairs, recalls | $120-$350 per hour | Limited locations |
When picking professional services, check their experience with your RV roof type. Ask for references from other RV owners. Quality professional support ensures your roof repairs meet industry standards and protect against water damage.
We suggest building relationships with these resources before you need them. Having trusted contacts and reliable information sources makes emergencies easier to handle. It helps keep your RV in great shape over time.
Summary: Keeping Your RV Roof Leak-Free
Keeping your RV roof leak-free is key. It saves money and stress. We’ve shared important tips for every RV owner to keep their investment safe.
Key Prevention Strategies
Regular RV roof checks are vital. Do monthly quick looks and detailed checks seasonally. This catches problems early.
Use the best RV roof sealant on vents, seams, and fixtures. Clean your roof often to avoid debris damage.
Building Maintenance Habits
Regular care is better than fixing big problems. Make a maintenance plan with check-up dates and cleaning times. Keep repair tools ready for quick fixes.
Keep track of your maintenance to plan for the future. This helps you stay on top of your RV’s needs.
Your Path Forward
Start these practices now. Begin with a detailed RV roof check this weekend. Then, set up your maintenance routine.
Remember, experts are there for tough issues. Your hard work today means fewer worries tomorrow. Enjoy many worry-free trips ahead.