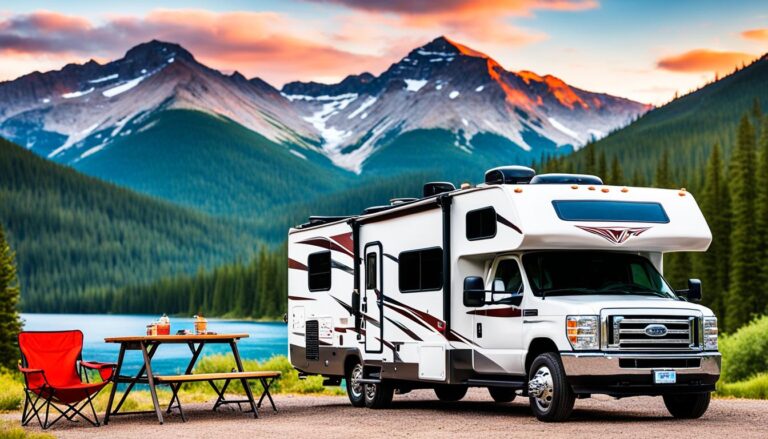
As the colder weather approaches, it’s time to care for your RV. Winterizing it protects from winter’s harm. This guide will show you how to properly prepare your RV for winter. It’s the key to avoiding expensive damage and having it ready for fun next year.
Key Takeaways
- Understand the importance of winterizing your RV to prevent freeze damage and extend its lifespan
- Learn the essential steps to winterize your RV’s plumbing system and appliances
- Discover tips for protecting your RV’s exterior, including the roof, awnings, tires, and batteries
- Explore indoor and outdoor storage options to keep your RV safe and secure during the winter
- Familiarize yourself with the RV winter maintenance checklist to ensure a smooth de-winterization process
The Importance of Winterizing Your RV
Preparing your RV for winter is key. It helps avoid damage from cold weather. This way, your RV can last longer and stay in good shape.
Preventing Freeze Damage
Winterizing your RV stops its pipes from freezing. If water inside them freezes, it can break the pipes. This leads to costly repairs. By adding rv antifreeze and draining water, you keep things safe.
Extending Your RV’s Lifespan
Winter weather can be tough on your RV. Snow, ice, and cold winds can harm it. But with the right winterizing rv steps, like protecting the roof, you can guard against this. It helps keep your RV going strong for more years.
Putting in the work to winterize your RV is worth it. It’s not hard, and it pays off big in peace of mind. By protecting your vehicle’s inside and outside, you ensure it’s ready for spring adventures.
Steps to Winterize Your RV’s Plumbing System
As winter comes, preparing your RV’s plumbing is key. This protects against freeze damage and ensures your RV is ready for winter. By following simple steps, you safeguard your plumbing and your investment.
Draining your RV’s water is step one. This means flushing the water heater and emptying the fresh, gray, and black water tanks. You also need to use RV antifreeze in the lines. This step stops ice from forming and prevents costly pipe bursts.
- Drain the fresh water tank: Locate the drain valve, typically located at the bottom of the tank, and open it to allow the water to drain completely.
- Drain the gray and black water tanks: Find the drain valves for these tanks and open them to empty the contents.
- Flush the water heater: Turn off the water heater and allow it to cool, then open the drain valve to remove any remaining water.
- Add RV-specific antifreeze: Pour the recommended amount of non-toxic, RV-safe antifreeze into the plumbing system, ensuring it reaches all the way through the lines and fixtures.
Winterizing your RV’s plumbing is important. It keeps your vehicle safe from winter’s damages and prolongs its life. This essential yet straightforward task brings peace of mind. It helps you enjoy your RV over many years to come.
| Step | Description |
|---|---|
| Drain the fresh water tank | Locate the drain valve, typically at the bottom of the tank, and open it to allow the water to drain completely. |
| Drain the gray and black water tanks | Find the drain valves for these tanks and open them to empty the contents. |
| Flush the water heater | Turn off the water heater and allow it to cool, then open the drain valve to remove any remaining water. |
| Add RV-specific antifreeze | Pour the recommended amount of non-toxic, RV-safe antifreeze into the plumbing system, ensuring it reaches all the way through the lines and fixtures. |
Prepare your RV for winter to avoid damages. Take these steps to ensure your vehicle is ready for more adventures. Stay ahead with these how to winterize your rv and rv winter protection tips.
How to Winterize Your RV’s Appliances
With colder weather on the way, it’s key to winterize your RV’s appliances. Doing this prevents damage and prepares them for the next camping season. Cleaning, draining, and protecting your refrigerator and water heater is important. It lengthens their lifespan and makes the rv winter storage guide and rv winter de-winterizing easier.
Refrigerator Winterization
Here’s how to winterize your RV’s fridge:
- First, unplug it and turn off the power.
- Next, take out all the food and clean the inside well. Don’t forget the shelves and ice trays.
- Keep the door open for good air flow to stop mold.
- For fridges with water lines, make sure to disconnect and drain them.
- Lastly, put a bit of petroleum jelly on the gaskets to keep them from drying out and cracking.
Water Heater Winterization
For the water heater, preventing freeze damage is crucial. Here’s what to do:
- Shut off the power to the heater, no matter if it’s electric or propane.
- Find the drain valve and open it to let all the water out.
- Once it’s empty, keep the valve open for good air flow.
- For tankless heaters, follow the manufacturer’s winterization guide.
- Adding antifreeze to the lines can give extra protection.
Winterizing your RV’s appliances is a smart step. It ensures they work well when you need them again. It also makes the rv winter storage guide and rv winter de-winterizing smoother.
how to winterize your rv
Getting your RV ready for winter is key to keeping it safe and ready for spring. You need to do quite a bit to winterize it. That means draining water, using antifreeze, and protecting the inside and outside. Doing this right will make sure your RV is in top shape when it’s time to travel again.
Draining the Water Systems
The first thing you must do is drain the water. This is done by emptying the fresh water tank, the water heater, and all the pipes. Without this step, the water in these systems can freeze, busting your RV’s pipes and fixtures.
- Find the low point drain valves and open them to let water out.
- Turbo-charge the draining by turning on the water pump and opening faucets wide.
- Don’t forget to clear out the water heater too.
Adding Antifreeze
Next, it’s time to protect the systems with antifreeze. This special fluid stops pipes and fixtures from freezing. It’s safe for people and pets, so don’t worry about using it.
- Hook a hose to the city water inlet and stick the other end in a container of antifreeze.
- Then, turn on the water pump. This will push antifreeze everywhere, ensuring all parts are covered.
- Last, but not least, pour some antifreeze in sinks, showers, and the toilet for good measure.
Preparing the Exterior and Interior
Don’t stop at the water. The outside and inside of your RV need love too. You’ve gotta shield the roof, awnings, and tires and tidy up inside.
- Scrub the roof and stash awnings away for the winter.
- Top off the tire pressure and think about covering them with tire protectors.
- Give the inside a good cleaning and remove food that could spoil.
- Seal up vents, windows, and doors to keep the cold out and critters away.
By carefully completing these steps, you’ll be sure your RV can handle the cold. Proper winterization safeguards your investment and adds life to your RV. It’ll be all set for new adventures when the weather warms up.

| Step | Description |
|---|---|
| Drain Water Systems | Locate and open low point drain valves, turn on water pump, and drain water heater. |
| Add Antifreeze | Attach hose to city water inlet, insert into RV antifreeze, and circulate through plumbing. |
| Prepare Exterior | Clean and protect roof, retract or remove awnings, inflate tires, and use tire covers. |
| Prepare Interior | Clean thoroughly, remove perishable items, and cover vents, windows, and doors. |
Preparing Your RV’s Exterior for Winter
Getting your RV ready for winter is very important. You should look after the roof, awnings, tires, and batteries. Doing this will help your RV last longer and be ready for adventures in the future.
Protecting the Roof and Awnings
The roof of your RV defends it from winter weather. It’s smart to buy a good cover to protect it from snow and the sun. This will stop leaks and keep your RV in good shape.
Remember to fold up and secure the awnings. This will help prevent snow damage and wind wear.
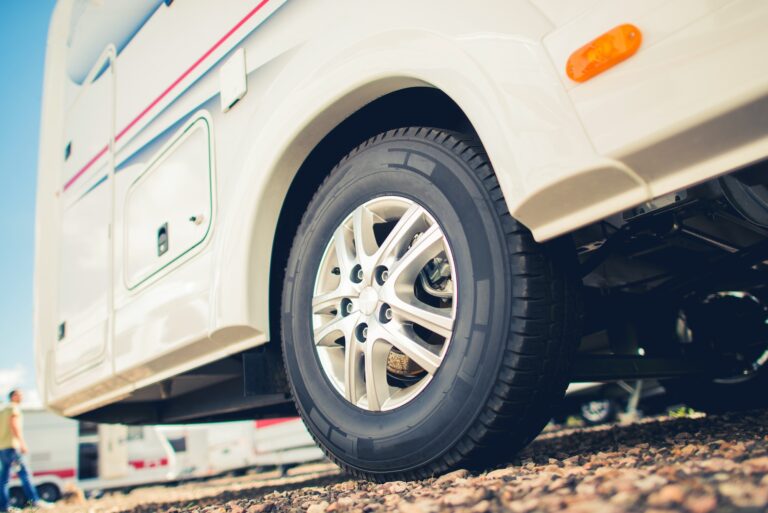
Winterizing the Tires and Batteries
Take extra care of your RV’s tires and batteries for winter. Keep the tires at the right air pressure. You might want to use tire covers to stop them from getting damaged by cold weather.
For the batteries, take them out and store them in a cool, dry spot. Make sure they stay charged for when you use your RV again.
Taking these steps to look after your RV means you could avoid expensive fixes. Plus, you can enjoy camping when it gets warm again without worries.
“Proper winterization is the key to keeping your RV in top shape and ready for your next adventure.”
Storing Your RV for the Winter
As the cold months near, thinking about winter RV storage is wise. You must choose between storing it indoors or outdoors. This can greatly affect how well your RV is shielded from the weather and possible harm.
Indoor vs. Outdoor Storage Options
You have two big options for storing your RV in the winter: indoors or outdoors. Each choice has its own pros and cons. Your decision will depend on what you need and what options you have in your area.
Indoor Storage
Keeping your RV inside brings the best protection from winter’s harsh elements. Places like garages or units keep it safe from rain, snow, and extreme cold. This lowers the chance of damage from moisture, rust, and more. However, indoor storage can be pricey and might mean more transport costs.
Outdoor Storage
Storing your RV outside is usually cheaper but provides less defense against the weather. If outdoor storage is your pick, make sure to winterize properly. This means covering it well and protecting important parts like tires and batteries.
Whatever storage you choose, preparing your RV well for winter is key. This ensures it stays in good shape and is ready for fun in warmer weather.
| Indoor Storage | Outdoor Storage |
|---|---|
|
|
When choosing between indoor and outdoor storage, consider the goods and bads. Pick the one that meets your needs and budget the best. Prepping your RV correctly for winter is a must, no matter the storage type.

“Proper storage is essential to protect your RV from the elements and potential damage.”
RV Winter Maintenance Checklist
As winter nears, it’s key to prep your RV for storage. This checklist will safeguard your RV and ease its spring revival. Let’s cover what you need to do for the off-season.
- Drain the Water System: Begin by emptying the fresh water tank, heater, and pipes. This step avoids damage from freezing. Afterwards, protect the plumbing with RV antifreeze.
- Clean and Condition the Interior: Clean deeply inside, in the fridge, cabinets, and on the floors. This step stops mold. After cleaning, let the RV breathe to keep air fresh.
- Protect the Exterior: Check and fix the roof, seals, and sealants. This thwarts water leaks. Plus, cover the RV well to guard against weather wear.
- Maintain the Tires and Batteries: Ensure tires are properly filled and in good shape. Consider covers if outside to fight the sun. For batteries, keep indoors cooled or trickle charge them.
- Inspect and Lubricate Moving Parts: Oil the slideouts, hinges, and all parts that move to avoid them locking up.
- Document the Winterization Process: Record steps for winterizing, what products you used, and any fixes you made. This info will aid in turning your RV back on easily.
Working through this checklist guards your RV from the cold and sets it up for a warm weather adventure. Good winter protection tips and rv winter de-winterizing are your motorhome’s best friends, increasing its lifespan and your enjoyment.
Reversing the Process: De-Winterizing Your RV
Spring is here, and it’s time to get your RV ready for the road again. De-winterizing your RV is vital after the winter. It makes sure your RV is in great shape to start your next journey. Follow a few steps and you’ll be good to go.
Flushing the Plumbing System
The first big step is to flush the plumbing system. You might have put in antifreeze to protect it from freezing. But, now you need to clean the system and get it working normally again.
- Hook up your RV to fresh water and start the water pump.
- Open all the faucets to let the water run and clear out the antifreeze.
- Close the faucets when the water’s clear and check for any leaks.
- For a water heater, fill it with fresh water and check if it’s working ok.
This cleaning step is key. It gets your RV’s water ready for use. This way, you’re set to avoid problems when camping.
It’s important to de-winterize your RV right. This keeps it in good shape and ensures a worry-free trip. After following these steps, you can enjoy new adventures. And you can make great memories with those you love.
Conclusion
Now you know how to get your RV ready for the winter. You learned to protect it from cold and snow. Taking care of the plumbing and outer parts is key.
Learning how to winterize your rv is vital. Doing so will make your RV last longer. It ensures you have a trouble-free spring, ready for fun adventures.
Keep in mind, preparing your RV well is crucial. It guarantees years of carefree travel. Following our advice keeps your RV in great shape for many enjoyable trips.